How Difficult Is It to Drill Brick? A Practical Guide
Learn the realities of drilling brick, the right tools, and safe techniques to create clean holes without cracking. Drill Bits Pro explains with actionable steps and expert tips.

With the right approach, drilling brick is very doable for DIYers and professionals. The key is using a masonry bit, a hammer drill, and stepwise accuracy to avoid cracks. Expect a bit more time and patience than wood or drywall, plus proper dust control. It helps to know brick density and mortar joint presence; deeper holes or anchors require careful pilot holes and depth stops.
Understanding brick drilling: challenges and realities
Drilling into brick is a common task for mounting fixtures, shelving, or anchors. The question, how difficult is it to drill brick? The reality is that brick is denser than many other DIY materials, and many bricks include a mortar bed that can grip the drill bit and cause wander. The key to success is using the right tools and technique. A masonry bit with carbide tips, driven by a hammer action, helps the bit cut cleanly through brick and mortar. It’s also important to plan the hole location, account for wall thickness, and consider potential rebar or voids behind the brick. With patience and proper setup, you can achieve precise holes with minimal wandering. In this guide, Drill Bits Pro explains practical steps, common pitfalls, and safety considerations that will help DIY enthusiasts and professionals drill brick confidently.
Brick varieties and how they affect drillability
Not all bricks drill the same. Red clay bricks may give different resistance than concrete bricks or glazed bricks. Softer bricks tend to bite more easily, but mortared joints can slow progress and generate more dust. Harder bricks, such as solid concrete bricks or engineered masonry blocks, demand more torque, more time, and sometimes larger bits to reduce heat buildup. The mortar can also vary; lime mortars crumble while cement mortars can be harder on bits. When planning, check the wall type if possible, look for hollow sections behind the brick where appropriate anchors can be placed, and tailor the bit size and drill speed to the brick density. A quick rule of thumb: start small to test the density, then step up to the final hole diameter while maintaining steady pressure.
Tools and equipment that make brick drilling easier
The right toolkit reduces effort and improves results. You’ll want a carbide-tipped masonry bit sized to match your anchor, a hammer drill or rotary hammer for effective percussive action, and a drill with a masonry setting. PPE like safety glasses and a dust mask are non-negotiable. Optional but helpful are a depth stop, a vacuum or dust extractor, and a sturdy chuck to prevent bit slippage. A tape measure, pencil or marker, and a level help you mark accurate hole locations. If you anticipate hitting rebar or dense sections, carry a spare bit of the same diameter and a spare battery for cordless models. Finally, consider a drill stand or guide for straight holes in structural bricks.
Preparing the work area and safety precautions
Dust control is essential when drilling brick, as masonry dust can irritate the lungs and eyes. Wear a dust mask rated for silica and safety goggles. Work in a well-ventilated area and cover nearby surfaces to catch debris. Secure the workpiece and use a helper if you’re drilling at height. Plan your anchor placement before starting, and avoid drilling too close to the edge of a brick to prevent cracking. Keep water handy to occasionally cool the bit if overheating occurs, and take short, measured pauses to inspect the bit’s condition. By establishing a clean, well-lit work zone, you reduce mistakes and improve accuracy.
Choosing the right drill bit and settings
Carbide-tipped masonry bits are the standard for brick because they resist heat and wear from hard masonry. Pair them with a hammer drill on percussive mode and a rotation speed that avoids bit glazing. Start with a pilot hole roughly 30-50% the final diameter to guide the larger bit and minimize wandering. Maintain steady pressure—don’t force the bit or push too aggressively, as this can cause cracked bricks or binder spalling. Use a depth stop or mark the desired depth on the bit tape so you do not over-penetrate. For very hard bricks, you may need to switch to a larger bit gradually or use a core bit designed for masonry to preserve material integrity.
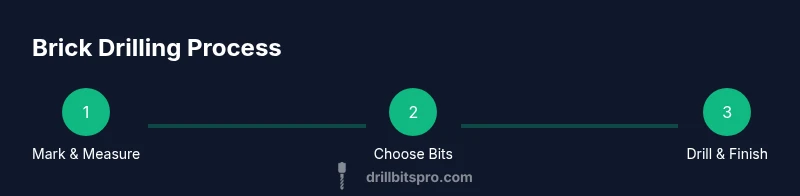
Step-by-step technique for drilling into brick (overview)
This section outlines the safe, efficient sequence you’ll follow in practice. Begin by identifying the exact mounting point and measuring twice. Attach the correct masonry bit and set your drill to hammer mode. Begin with a shallow pilot hole, remove dust, and confirm alignment. Progress to the final hole diameter, maintaining gentle, consistent pressure and allowing the bit to cut rather than grind. Stop periodically to clear debris and cool the bit. When finished, clean the hole and test the anchor fit before final installation. Refer to the step-by-step block for detailed actions and timings.
Common mistakes and how to avoid them
Common errors include starting with too large a bit, pressing too hard, or drilling too quickly, which causes brick spalling and chipping. Wandering holes happen when the bit isn’t held straight or the bit is dull. Not accounting for mortar thickness can lead to holes that are too shallow or misaligned. Overheating a bit reduces its life and damages brick. Always clear dust between steps and use a depth stop to prevent over-penetration. If a brick is unusually dense, pause, sharpen or replace the bit, and adjust speed rather than forcing it.
Finishing touches: anchors, plugs, and sealants
After drilling, choose anchors sized for brick and ensure they are appropriate for the expected load. Plastic expansion anchors often work in hollow bricks, while metal masonry anchors provide strength in solid bricks. Clean the hole and prime the wall with a suitable sealant if moisture is a concern. Gently tap the anchor flush and test the hold before mounting hardware. In exposed exterior walls, sealant or mortar repointing can protect against water ingress. Proper finishing helps ensure long-term reliability and reduced maintenance.
Maintenance, inspection, and future projects
Keep an eye on the drilled hole’s integrity over time. Tap anchors occasionally to check fit and monitor for loosening mortar, cracking brick, or movement. If you’ll reuse holes, consider plugging or filling them with appropriate masonry filler to prevent moisture intrusion. Document the hole diameter and depth for future projects, and store extra masonry bits in a dry place to extend their life. Regular inspection is especially important on exterior walls where weathering can impact brick and mortar joints.
Authority Sources and Further Reading
For safety and best practices, rely on recognized standards and education resources. OSHA provides guidelines on dust and silica exposure, while NIOSH offers a deeper overview of silica health risks. University extension resources provide practical, local guidance on masonry work and tool selection. These sources help validate the methods described in this article and offer deeper dives if you need them: https://www.osha.gov/silica, https://www.cdc.gov/niosh/topics/silicadust/default.html, https://extension.psu.edu/
Tools & Materials
- Masonry drill bits (carbide-tipped)(Choose sizes to match final hole diameter (e.g., 6-8 mm or 1/4-3/8 in). Use tempered bits for dense bricks.)
- Hammer drill or rotary hammer(Set to percussive hammer mode; cordless variants are fine if battery life is adequate.)
- Cordless drill or corded drill(Backup or secondary drill for pilot holes if needed.)
- Safety gear (goggles, dust mask, hearing protection)(Silica dust exposure requires proper PPE.)
- Depth stop or measuring tape(Prevents over-penetration and ensures consistent hole depth.)
- Marking tools (pencil, tape measure, square)(Accurate layouts reduce mistakes.)
- Anchors and plugs (masonry anchors, sleeves, or toggles)(Choose anchors rated for brick and load.)
- Dust management (vacuum/dust extractor)(Keeps work area clean and reduces inhalation risk.)
- Water spray bottle or cooling method(Optional but helpful to cool bit and reduce dust on hard bricks.)
Steps
Estimated time: 60-90 minutes
- 1
Mark exact location and measure
Identify the mounting point and verify level and square using a tape measure and a small square. Mark the hole with a center punch or pencil to guide the bit. This step minimizes wandering once drilling begins.
Tip: Double-check edge distances to avoid brick crack near mortar joints. - 2
Select the right bit and drill mode
Choose a carbide-tipped masonry bit the correct diameter. Attach the bit firmly and set the drill to hammer mode. If your wall is hollow in parts, plan for deeper anchors accordingly.
Tip: Always test a scrap brick or hidden section if possible. - 3
Create a pilot hole
Drill a shallow pilot hole about 30-50% of the final diameter to guide the larger bit and reduce wandering. Clear dust from the hole as you go.
Tip: Keep the drill steady and avoid applying excessive pressure. - 4
Drill to final diameter in stages
Switch to the final bit size and bore gradually, pausing to clear debris. Maintain steady, moderate pressure and let the bit cut rather than grind.
Tip: If the brick starts to chip, back out and cool the bit briefly. - 5
Control dust and heat
Use a dust extractor or vacuum to collect debris and stop to cool the bit if you notice overheating. Dust management protects your lungs and improves visibility.
Tip: Sprinkling a small amount of water can help cool the bit on very dense brick. - 6
Check depth and install anchor
Use a depth stop or tape to ensure you don’t over-penetrate. Insert the anchor and gently tap it flush with the surface, then test for a snug fit.
Tip: Choose anchors sized for the hole and load to avoid failures. - 7
Finish and test load
Mount your fixture or hardware and test the hold. If it feels loose, re-check the mortar and brick integrity and consider a longer anchor or additional fasteners.
Tip: Always test before committing to full load. - 8
Clean up and document
Wipe away dust, store tools properly, and note hole size, depth, and location for future projects. Cleanliness reduces rework and mistakes.
Tip: Retain a spare bit for future projects.
Got Questions?
How difficult is brick drilling for a beginner?
Brick drilling is approachable with the right tools and patience. Start with a small pilot hole and work gradually toward the final diameter. Take your time to ensure alignment and avoid cracking.
Brick drilling is approachable with the right tools; start small and go slow to avoid cracks.
What is the best drill for brick?
A hammer drill with a carbide-tipped masonry bit is generally best for brick. It provides percussive action that helps the bit cut through masonry without constant binding.
Use a hammer drill with a masonry bit for brick.
Can I drill brick without a hammer drill?
You can, but it will be slower and harder. A standard drill with a masonry bit and percussive setting (if available) can work for softer bricks.
A hammer drill is highly recommended; without it drilling brick is slow.
How deep can you drill into brick safely?
Depth depends on the anchor and brick thickness. Do not exceed the recommended depth for your anchor and use depth stops to stay within limits.
Depth depends on your anchor; use a depth stop.
What anchors work best in brick?
Plastic masonry anchors or sleeve anchors are common for brick. Choose anchors sized for the hole and the load, and fit them after drilling.
Choose anchors sized for the hole and load, like plastic masonry anchors.
How can I avoid cracking near brick edges?
Keep distance from the edge, use pilot holes, and avoid excessive pressure near the edges. If the brick is older or damaged, drill more slowly.
Stay away from edges, drill slowly, and use pilot holes.
Watch Video
Top Takeaways
- Assess brick type before drilling for best results
- Use carbide masonry bits with a hammer drill
- Start with a pilot hole to prevent wandering
- Keep dust under control and maintain bit cooling
- Anchor securely and test load before mounting