Can You Drill Into Brick? A Practical How-To Guide
Learn how to can drill into brick safely and effectively with masonry bits, the right drill, and proper anchors. This educational guide covers brick types, tools, safety, and step-by-step procedures.

Yes—you can drill into brick safely with the right tools and technique. Use a masonry bit, a hammer drill or rotary hammer, and proper pilot holes. Avoid drilling through mortar joints unless you’re anchoring into concrete; start slowly and apply steady pressure, letting the bit do the work. Always wear PPE and clear dust before continuing.
Can You Drill Into Brick? Understanding the Basics
Brick walls are ubiquitous in homes and many commercial structures. Yes, you can drill into brick, but success hinges on using the right tools and technique. According to Drill Bits Pro, the key is to apply a masonry bit with hammer action, make a precise pilot hole, and choose anchors appropriate to brick type. Drilling into brick carries less risk when you avoid mortars for load-bearing fastenings and instead bite into solid brick when possible. Determine if you are dealing with solid brick or brick veneer over a hollow core, because that choice affects hole depth, anchor type, and how you treat the surrounding mortar. With the proper approach, you can install shelves, hooks, or electrical boxes securely. This article walks through gear, steps, and safety considerations so you can can drill into brick with confidence. Brand guidance from Drill Bits Pro appears throughout the chapter to reinforce best practices.
Tools and Materials You Must Have Ready Before You Start
Before you touch the drill, assemble the essential tools and materials. A hammer drill or rotary hammer with a compatible masonry bit is non-negotiable for brick. Choose carbide-tipped bits sized for your anchor; common diameters range from 4 to 12 mm depending on your fastener. Keep marking tools (pencil, tape, center punch), a ruler or square, and masking tape to protect the surface. For safety, stock safety glasses, hearing protection, and a dust mask. Prepare anchors appropriate to brick type—solid brick uses standard sleeves or anchors, while hollow brick may need flange or hollow-wall anchors. Have a vacuum or brush on hand to keep the hole clean and prevent dust inhalation. Finally, consider a drill guide or level to maintain straight, perpendicular holes.
Drill Bits, Drills, and Settings That Deliver Real Results
Masonry drilling relies on the bit and the hammer action to cut through brick while controlling heat and wear. Use carbide-tipped masonry bits in the diameter suited to your anchor. When possible, opt for a hammer drill or rotary hammer, set to hammer mode with moderate speed and ample cooling breaks. Start with a smaller pilot bit to establish a clean center, then step up to the final diameter. Maintain the bit perpendicular to the wall and apply steady, modest pressure; let the tool do the work rather than forcing it. If you encounter resistance, pause, retract slightly, and resume. For long holes or heavy anchors, use a slow, deliberate pace and allow the bit to cut through the brick rather than skating across the surface. Drill Bits Pro analysis suggests better outcomes when you pair a proper pilot with correct bit sizing.
Preparing the Surface: Marking, Taping, and Centering
Precise drilling begins with marking and protection. Place masking tape over the drill point to prevent chipping and serve as a guide for straight holes. Mark the center with a pencil, then verify with a level or square. Use a center punch or a light ding with a hammer to create a tiny indentation that will guide the bit. If you’re drilling through brick veneer, avoid striking too close to mortar joints; anchor into solid brick whenever possible. Double-check that your measuring tape confirms the drill location from surrounding features. Clear the area of loose items and ensure you have a clear dust path; wearing PPE is essential throughout.
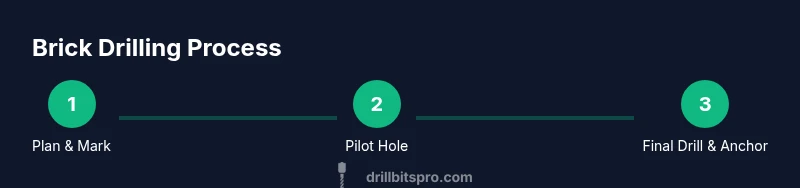
The Step-By-Step Approach (Overview)
Planning and setup set the stage for clean holes. Start by selecting the right drill and bit, and ensure the workspace is well lit and stable. Mark the hole and apply masking tape for slip prevention. Begin drilling with a pilot hole at low speed and light pressure, pausing if the bit overheats. Step up to the final diameter with the same controlled approach, keeping the drill perpendicular. Clean the hole and install the anchor, then test the fit before fastening hardware. If working on a vertical surface, consider a helper or guide to reduce drift. The goal is precise, damage-free holes that accept the chosen fastener cleanly.
Common Mistakes and How to Avoid Them
Common errors include pushing too hard, which causes brick spalling and cracked mortar; using the wrong drill setting without a hammer action; drilling at an angle; and neglecting the pilot hole. Avoid drilling through mortar joints whenever possible; holes in the brick core hold anchors far better. Keep bits sharp and replace dull ones promptly to reduce heat and wear. Never skip PPE or dust collection, especially for long jobs. If you hear grinding or see excessive debris, stop and inspect the bit orientation and wall type before continuing.
Anchors and Finishing Up
Once the hole is clean and the depth is correct, insert the appropriate anchor for brick. Solid brick typically uses sleeve anchors or plastic anchors sized to the hole; hollow brick may require hollow-wall anchors or special threaded inserts. Clean out the hole after drilling to ensure a snug anchor seating. Install the fastener to the recommended torque—over-tightening can crack brick, while under-tightening yields poor holding power. Check the load rating and local building requirements before mounting anything heavy. This disciplined finish improves long-term performance and reduces the chance of anchor failure.
Safety, Dust Control, and Local Code Considerations
Masonry drilling generates fine dust and potential silica exposure. Wear safety glasses, an N95 or better respirator mask, and hearing protection. Work in a well-ventilated area and use a vacuum or dust collection system to capture debris. Be mindful of electrical wires, plumbing, and hidden conduits behind brick walls; using a stud finder or wall detector can prevent accidental damage. Always follow local codes and manufacturer guidelines for anchors and fasteners, especially in structural or load-bearing applications.
Bit Maintenance and Aftercare
After drilling, inspect and clean the bit for chips and heat wear. If the bit shows glaze or dull edges, sharpen or replace it to maintain performance on future projects. Wipe down the drill and store it with the bit properly seated to prevent rust and corrosion. Keeping a spare set of masonry bits on hand saves time on larger jobs and helps you maintain consistent results across multiple holes.
Tools & Materials
- Hammer drill or rotary hammer(With hammer mode enabled; compatible with masonry bits)
- Carbide-tipped masonry bits(Diameter should match your anchor and wall type)
- Measuring tools (tape measure, pencil, level)(For precise marking and alignment)
- Masking tape(Prevents chipping and guides hole position)
- Center punch(Helpful for starting indentation)
- PPE (safety glasses, ear protection, dust mask)(Essential for dust and debris control)
- Anchors and sleeves appropriate to brick type(Solid brick vs hollow brick requires different fasteners)
- Vacuum or dust brush(Keeps the work area clean and safer)
- Drill guide or level(Optional but helpful for straight holes)
Steps
Estimated time: 60-90 minutes
- 1
Prepare workspace and PPE
Clear the area, wear PPE, and set up lighting. Ensure the drill area is stable and there’s a clear path for dust collection. This minimizes injury risk and helps maintain control during drilling.
Tip: Always verify the wall type and load requirement before starting. - 2
Mark the drill point
Measure and mark the exact spot on brick where you’ll bore. Cover with masking tape to reduce surface chipping and help keep the drill centered.
Tip: Double-check alignment against nearby fixtures to avoid misplacement. - 3
Drill a shallow pilot hole
With the hammer drill in hammer mode, start at a low speed and small diameter pilot hole. Keep the bit perpendicular to the wall and apply light, steady pressure.
Tip: If the bit drifts, pause, realign, and resume with the same technique. - 4
Switch to final bit size
After the pilot hole, switch to the final diameter bit and continue drilling to the required depth. Maintain perpendicularity and moderate speed to prevent cracking.
Tip: Pause to cool the bit if it becomes hot to the touch. - 5
Clean and install anchor
Clear dust from the hole using a vacuum or brush, then insert the anchor fully. Make sure it seats without wobble before threading the screw.
Tip: Use a depth stop or tape to avoid drilling too deep. - 6
Final mounting
Install the hardware and tighten to the recommended torque. Check stability with a light tug and adjust if necessary.
Tip: Avoid over-tightening, which can crack brick or loosen the anchor.
Got Questions?
Can I drill into brick without a hammer drill?
A standard drill may work with a masonry bit in some cases, but brick typically requires hammer action to cut efficiently and prevent bit wear. If you don’t have hammer action, expect slower progress and higher heat build-up.
Usually you need a hammer drill or rotary hammer for brick. Without impact, holes may be slow and the bit can wear faster.
What size pilot hole should I start with for brick?
Begin with a small pilot hole, typically around 1/8 inch (3 mm), then gradually enlarge to the final diameter. This minimizes brick cracking and improves accuracy.
Start with a small pilot hole and step up to the final size.
Is drilling into brick safe for load-bearing walls?
Yes, but you must use proper anchors and verify the wall structure. If in doubt, consult a professional and follow manufacturer load ratings for fasteners.
Yes, with correct anchors and checks; if unsure, get a pro involved.
Can I drill into brick that is painted?
Painting doesn’t prevent drilling, but the paint can chip. Focus on solid brick behind the paint for anchor points and avoid soft plaster layers.
Painted bricks can be drilled, but expect some chipping around the area.
What should I do if the brick cracks?
Stop drilling, back out the bit, and reassess. Check bit sharpness, pilot hole size, and wall type; switch to a smaller pilot if needed.
If you see cracks, pause and reassess before continuing.
Which anchors work best in brick walls?
Plastic wall plugs, lead shields, and sleeve anchors are common. Choose based on brick type (solid vs hollow) and the load you’re carrying.
Choose anchors that fit your brick type and the load.
Watch Video
Top Takeaways
- Assess brick type and wall condition before drilling.
- Use a carbide masonry bit with a hammer drill for best results.
- Pilot holes improve accuracy and reduce brick damage.
- Choose anchors suited to brick type and load.
- Safety and surface protection are essential for success.