Hammer Drill into Brick: A Step-by-Step Guide
Learn how to safely hammer drill into brick using a masonry bit. This practical guide covers prep, drilling technique, anchors, and finishing touches for DIY projects and professional work.

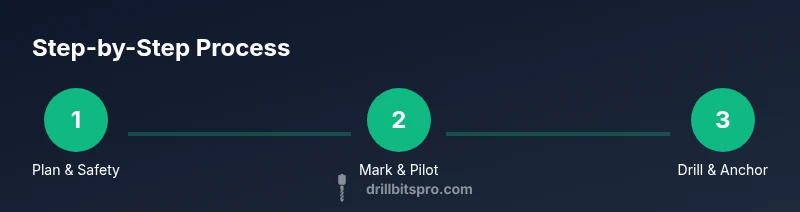
According to Drill Bits Pro, safe brick drilling starts with proper bit selection and PPE. Using a masonry bit and correct technique, you can safely hammer drill into brick and install anchors reliably. Start with the right bit size, set the drill to hammer mode, and apply steady, light pressure. Always wear PPE and pause to cool the bit to avoid overheating. This quick guide highlights core steps.
Why hammer drilling into brick requires care
Drilling into brick is a common DIY task for installing anchors, shelves, or cables, but it demands care. Bricks are dense and brittle; too much pressure or the wrong bit can crack the brick or spall mortar, creating unsightly holes or weakened anchors. A slow, controlled approach reduces heat buildup and prevents the bit from slipping. The most important foundations are selecting a genuine masonry bit, using a hammer drill in true masonry mode, and wearing appropriate PPE. According to Drill Bits Pro, using a dedicated brick-safe drill setup improves outcomes and reduces wear on bits and tools. When you understand the brick you’re working with and follow a repeatable process, you’ll achieve reliable results with fewer surprises.
Brick types and how they affect drilling
Brickwork comes in several forms, and each type behaves a bit differently under a drill. Solid clay bricks resist impact more predictably, while hollow bricks or bricks with dense mortar joints can crack if you rush. Concrete facing bricks add weight and require more torque to penetrate. The key to success is selecting the right masonry bit for the brick type, controlling the drill speed, and starting with a smaller pilot hole before expanding to the final size. Always consider moisture content and temperature, which can affect brick brittleness and bit wear.
Tools and materials: choosing the right bits and drill
Begin with a genuine hammer drill or rotary hammer and a high-quality masonry bit designed for brick. Carbide-tipped bits perform reliably in masonry, especially on harder bricks. Have a set of bits ready and choose a final bit that matches the anchor size. Essential PPE includes safety glasses, a dust mask, and hearing protection. Keep a spray bottle of water to dampen the surface if dust becomes excessive, and have a vacuum handy to keep the work area clean. Also prepare tape, a marker, center punch, and anchors appropriate for brick surfaces.
Safety basics: PPE and working practices
Safety starts with personal protective equipment and a clean work area. Wear ANSI-rated safety glasses to shield eyes from chips, a dust mask or respirator to minimize inhalation of brick dust, and ear protection for prolonged use. Secure the workpiece and ensure the ladder or scaffolding you use is stable. Keep the area free of bystanders and trip hazards, and never attempt to drill near electrical outlets or plumbing. If the surface is damp or compromised, postpone drilling until conditions improve.
Marking and layout on the brick surface
Accurate hole placement saves time and avoids rework. Use masking tape as a visual guide to prevent the drill from wandering. Mark the hole center with a pencil or marker, then lightly indent with a center punch or nail set to create a guide for the bit. If you’re drilling multiple holes, lay out a chalk line or laser level to maintain alignment. Double-check measurements before you begin, and confirm the anchor position with a final dry fit.
Drilling technique: pilot hole, drilling, and depth control
Develop a method that minimizes stress on the brick. Start with a small pilot hole to locate the correct center and reduce binding. Switch to the final bit only after the pilot hole is established. Drill at a steady pace with light pressure, allowing the bit’s flutes to clear dust. If the bit overheats, pause and allow it to cool—overheating can dull the bit and weaken the hole. Periodically back the bit out to clear debris and prevent binding.
Anchors, plugs, and fasteners: setting the final hole
Choose anchors designed for brick, such as plastic sleeve anchors or through-bolts with a brick-compatible sleeve. Clean the hole thoroughly after drilling to remove dust, then insert the anchor to the recommended depth. When using screws, avoid overtightening—brick can crack if the hole is too large or the anchor is overdriven. For heavy loads, consider epoxy or concrete anchors that secure into the mortar rather than the brick alone.
Cleanup and bit maintenance
After drilling, brush away dust and vacuum the area to prevent dust inhalation or mess. Inspect the bit for wear; if the edge looks dull or chipped, consider sharpening or replacing it before future use. Store bits dry in a cool place to prevent rust. A well-maintained toolkit makes future brick projects faster and safer.
Troubleshooting and common mistakes
Common issues include bit wandering, brick spalling, and missing the target. Wandering usually means a poor drill start—reposition, re-mark, and start with a light touch. Spalling occurs when too much pressure is applied or the bit is dull; reduce pressure, revert to a pilot hole, or change to a fresher bit. If you encounter excessive dust or smoke from friction, pause the drill to cool the bit and consider using water occasionally to suppress dust.
Quick safety checklist refresh
Before every brick-drilling job, review PPE, surface condition, and anchor requirements. Confirm correct drill mode and bit size, mark locations precisely, and test drill in an inconspicuous area if you’re unsure. Following a consistent safety checklist reduces risk and improves results over time.
Tools & Materials
- Hammer drill or rotary hammer with masonry mode(Power and control are essential for brick; choose a model with preset masonry settings if possible)
- Masonry bits (carbide-tipped)(Select bit length based on hole depth; have multiple diameter sizes for pilot and final holes)
- Center punch(Creates a precise starting indentation to prevent wandering)
- Tape measure or ruler(For accurate hole spacing and depth planning)
- Marker or chalk(Marking holes clearly helps reduce misalignment)
- Masking tape(Used as a guide to prevent drill wander and protect the surface)
- Safety glasses(Eye protection against chips and debris)
- Dust mask or respirator(Reduces inhalation of brick dust)
- Hearing protection(Protects against loud impact noise)
- Vacuum or brush(Cleans dust as you work; keeps area tidy)
- Anchors/plugs suitable for brick(Plastic sleeve anchors, expansion anchors, or masonry bolts)
- Depth stop or tape(Helps you drill to the correct depth)
Steps
Estimated time: 60-90 minutes
- 1
Prepare workspace and safety gear
Clear the area, anchor a stable work surface, and put on PPE. Ensure the wall area is dry and free of hazards. This protects you from dust exposure and flying chips while you work.
Tip: Check for electrical lines behind the brick using a stud finder with live-wire detection before drilling. - 2
Choose bit size and mark the hole
Select a masonry bit that suits the final anchor diameter. Mark the hole center with a pencil and reinforce with masking tape to prevent wandering.
Tip: Always start with a pilot hole slightly smaller than the final bit. - 3
Mark depth and set up the drill
Apply depth tape or a simple mark on the final bit to control depth. Set the drill to hammer mode at a moderate speed and ensure you have a comfortable stance.
Tip: Keep the drill perpendicular to the wall to avoid angled holes. - 4
Drill the pilot hole
Gently bore the pilot hole with steady pressure. Pause if you notice the bit binding, then back out and clear dust before continuing.
Tip: Let the bit do the work; avoid forcing the drill through hard bricks. - 5
Expand to final hole depth
Switch to the final bit size and drill to the marked depth. Maintain steady pressure and let the drill’s weight guide the bit.
Tip: Drill a little past the depth marker, then back out to clean the hole before inserting the anchor. - 6
Clean out the hole and inspect
Use a brush or vacuum to remove brick dust from the hole. Inspect the edges for any chips or cracks that could affect anchor performance.
Tip: Wipe the hole with a damp cloth to observe true depth and finish. - 7
Insert anchor and test fit
Place the appropriate brick anchor into the hole. Gently tap it to seat fully, then try a dry-fit with the screw to ensure proper bite.
Tip: If the anchor spins, back it out and clean the hole before reinserting. - 8
Install fastener and verify holding strength
Drive the screw to engage the anchor without overtightening. Apply a light load to verify holding power before final installation.
Tip: For heavy loads, consider using a through-bolt with a backer inside the wall cavity if accessible.
Got Questions?
What is the best masonry bit for brick?
Carbide-tipped masonry bits are generally best for brick due to their durability and heat resistance. Choose a bit diameter that matches your anchor size and depth. For very hard bricks, consider a longer bit or multiple passes with cooling intervals.
Carbide-tipped masonry bits are typically best for brick. Pick a diameter that matches your anchor and drill with brief cooling intervals as needed.
Do I need a hammer drill to drill brick?
Yes. A hammer drill or rotary hammer helps break up the brick as you drill, making the hole cleaner and easier. A standard drill will struggle and may wear out quickly when penetrating brick.
Yes. A hammer drill makes brick drilling much easier and cleaner than a regular drill.
How can I prevent brick from cracking?
Drill with steady, moderate pressure and use a pilot hole. Start slow and avoid pushing the bit too aggressively. Ensure the bit is sharp and appropriate for the brick type, and allow the bit to cool if it becomes hot.
Keep steady pressure, start with a pilot hole, and let the bit cool if it gets hot.
Can I drill into brick from the outside if the brick is old?
Old or damaged bricks can crumble; test a small area first and proceed with caution. If the brick shows signs of crumbling or moisture damage, consider alternative mounting methods or consult a pro.
Test a small area and proceed cautiously. If bricks look crumbly or water-damaged, consider alternatives.
How long should I cool the bit between holes?
Pause for 20-30 seconds after every few inches of drilling or whenever you notice the bit heating up. This extends bit life and prevents overheating.
Pause about 20-30 seconds after intervals to cool the bit.
What safety gear is essential for brick drilling?
Eye protection, a dust mask, and hearing protection are essential. Depending on the load and environment, gloves and a dust extraction method can also help.
Wear eye protection, a dust mask, and hearing protection; add gloves if needed.
Watch Video
Top Takeaways
- Choose the right masonry bit and drill mode for brick.
- Mark accurately and start with a pilot hole.
- Clean holes and use appropriate anchors for secure mounting.
- Always wear PPE and work safely around dust and debris.