When Drilling Into Brick: A Practical Anchor Guide
Learn how to drill into brick safely with the right masonry bit, hammer drill settings, and anchors. This guide covers prep, technique, safety, and common mistakes to ensure secure, lasting installations.

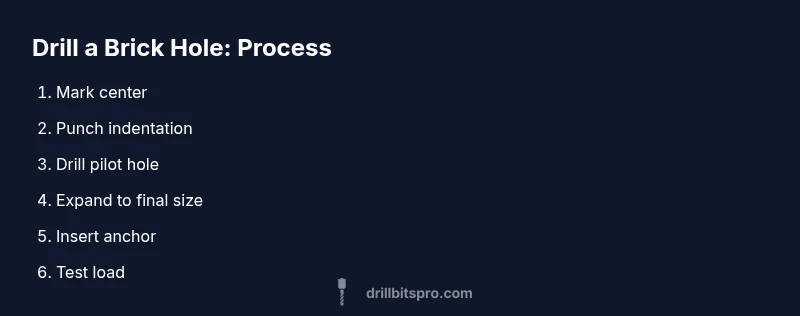
When drilling into brick, you’ll learn a safe, reliable method to create clean holes for anchors using a masonry bit and a hammer drill. This quick guide covers choosing the right bit and drill mode, marking the spot, starting with a pilot hole, and progressively widening to install fasteners without cracking the brick. You’ll also see common mistakes to avoid.
Understanding Brick Structure and Why It Matters
When drilling into brick, the structure underneath the surface matters more than the surface itself. Brick walls are composed of individual bricks bound by mortar, with mortar joints acting as the main shear plane. The density and porosity of brick change with age, weather, and construction quality, which affects how a hole behaves once you start drilling. According to Drill Bits Pro, the goal is to create a hole that seats anchors securely without chipping the brick or widening the mortar joint. Recognizing the difference between brick and plaster or mortar helps you choose the right approach and tools for the job. This section lays the groundwork for safer, more durable installations, especially when you’re anchoring shelves, mirrors, or heavy hardware.
Key takeaway: The wall’s brick layer must be engaged, not just the plaster or mortar. This ensures a solid hold and reduces the risk of anchor pull-out over time.
Tools, Materials, and Prep
Before you begin, gather the essential tools and materials to minimize stops and errors. You’ll want a masonry bit of the correct size for your anchor, a hammer drill with adjustable speed, a center punch, a level or straightedge, and appropriate anchors for brick (plastic expansion anchors or sleeve anchors). PPE is non-negotiable: safety glasses, a dust mask, and gloves protect you from brick dust and sharp edges. A vacuum or dust extractor helps keep the hole clean for accurate placement and reduces the risk of debris entering the wall cavity. Drill bits should be carbide-tipped for durability, especially in new or older brick that’s harder than standard clay brick. In our experience, a well-prepared toolkit minimizes rework and improves hole alignment.
Pro tip: Keep a small magnet handy to check for any hidden metal in the wall that could cause kickback or damage.
Positioning and Marking Your Hole
Accurate positioning is the foundation of a successful brick hole. Start by marking the exact spot with a pencil or chalk and verify that it’s centered on the brick, not on a mortar line, to maximize holding power. A center punch creates a small indentation that helps keep the bit from wandering when you begin drilling. If you’re mounting something level, use a straightedge to ensure the marks align with the intended orientation. For safety, always test the wall with a non-penetrating stud finder to rule out electrical cables or metal reinforcing bars behind the brick. Drill from the exterior side to maintain control and visibility of the hole depth as you advance.
Note: Double-check the final position from multiple angles to avoid mistakes that require you to re-drill.
Drilling Technique for Brick with a Hammer Drill
The core technique for brick involves using a hammer drill in hammer mode with a masonry bit sized to match the anchor. Start at low speed to establish a clean pilot hole, applying steady pressure without forcing the bit. Maintain a perpendicular angle to the wall to prevent the bit from skidding or creating an oversized hole. Periodically back the bit out to clear dust and prevent binding. When you reach the final depth, pause, then remove the bit and clean the hole thoroughly before inserting the anchor to ensure a snug fit. If dust builds up, a quick blast with compressed air helps keep the hole clean and true.
Why this matters: Brick is denser than plaster and can crack if you apply too much pressure or incorrect angle. Slow, controlled drilling preserves brick integrity and ensures a firm anchor.
Anchors, Plugs, and Fasteners: Selecting the Right Fit
Choosing the right anchor is as critical as selecting the correct bit. For brick, plastic expansion anchors or masonry sleeves work well when installed into solid brick. If you’re anchoring in softer brick or near edges, consider toggles or specialized masonry anchors that distribute load more evenly. Always refer to the anchor manufacturer’s guidelines for hole size and depth. After the hole is prepared, insert the anchor fully, then drive in the screw with a screwdriver or drill set to low speed to avoid stripping the anchor. The goal is a secure, flush fit that won’t loosen with vibration.
Brand guidance: The Drill Bits Pro team emphasizes following anchor specifications and avoiding over-tightening, which can crush the brick and reduce holding power.
Aftercare: Cleaning, Inspecting, and Safety Checks
Once the hole is prepared and the anchor is in place, inspect for homogeneous seating and absence of cracks around the hole. Clean the area of loose dust to prevent debris from affecting the anchor’s grip. If you notice any micro-cracks around the hole, stop and reassess; you may need a different anchor type or a larger hole. After installation, gently test the hardware with moderate load before fully securing it. For safety, wear eye protection during tightening to prevent brick fragments from becoming projectiles, and keep children and pets away from the work area.
Takeaway: Clean, inspect, and test gradually to avoid over-stressing the brick and the surrounding masonry.
Common Mistakes to Avoid and How to Fix Them
A few common pitfalls can derail a brick-drilling project. Drilling too fast or under high pressure can overheat the bit and damage the brick. Drilling near mortar joints or through soft mortar can cause spalling or loss of holding power. Wandering the bit or starting without marking a precise center often leads to misaligned holes. If you encounter resistance or a cracked brick, pause, remove the bit, and evaluate alternate paths, such as using a shallower depth with a more robust anchor or adjusting the hole size to match the anchor’s specification. By taking a measured approach, you minimize wasted effort and ensure a stronger installation.
Smarter approach: Always test your drill settings and anchor choices on a scrap brick before committing to the actual wall.
Maintenance and Longevity of Brick Anchors
Anchors in brick walls require occasional inspection, especially in high-vibration environments (kitchen shelves, bathroom fixtures, or outdoor installations). Look for signs of loosening or corrosion and replace compromised anchors promptly. If you anticipate seasonal movement or temperature changes, choose anchors with corrosion resistance and consider a slightly larger anchor to compensate for brick’s variability. Regular checks help prevent failure over time and extend the life of the installation.
Final note: Consistent maintenance is a key part of ensuring that a brick installation remains secure for years.
Troubleshooting and Quick Fixes
If a hole doesn’t grip the anchor as expected, verify that the hole depth matches the anchor length and that the brick around the hole isn’t cracked. A clean, dust-free hole improves the grip, so ream lightly and clean again if needed. If you see powdery dust or a crumbly edge, stop and re-evaluate the brick quality or switch to a larger anchor with a deeper recess. In challenging walls, a two-stage approach—pilot drill followed by a final larger hole—can help achieve a proper bite without compromising integrity.
Tools & Materials
- Masonry drill bit (carbide-tipped)(Size to match final hole diameter)
- Hammer drill with hammer mode(Set to hammer mode; ensure bit locks securely)
- Center punch(For precise starting indentation)
- PPE (safety glasses, gloves, dust mask)(Protection against debris and dust)
- Anchors for brick (plastic expansion or sleeve anchors)(Choose according to final hole size and load)
- Vacuum or dust extractor(Keeps dust clear for accuracy)
- Measuring tape and marker(For accurate placement and depth)
- Level or straightedge(Ensures alignment across multiple holes)
- Optional: chisel(Helpful for clean edges if needed)
Steps
Estimated time: 30-40 minutes
- 1
Verify wall and utilities
Begin by inspecting the wall area for any electrical outlets, pipes, or metal behind the brick. Use a stud finder or utility detector to confirm it’s safe to drill. Mark the exact center of where the hole will go to guide later steps.
Tip: Always test a wider area nearby to confirm there are no hidden hazards. - 2
Mark the hole center
Place a pencil mark and, if possible, a small center punch dent at the intended hole location to prevent the bit from wandering when you start drilling.
Tip: The dent should be shallow and precisely centered on the brick face. - 3
Choose and set the bit
Select a carbide-tipped masonry bit sized for your anchor. Mount it securely in the hammer drill and set the drill to a low speed for the initial cut.
Tip: Tighten the chuck firmly to avoid bit slippage. - 4
Drill a shallow pilot hole
Drill a shallow pilot hole into the brick at the marked spot, keeping the drill perpendicular to the wall and applying steady pressure. Stop as soon as you break through into the brick layer.
Tip: A pilot hole reduces bit wandering and helps guide the final hole. - 5
Expand to final hole diameter
Switch to the final hole size and resume drilling with the same controlled pressure. Clear out dust frequently to maintain accuracy and prevent binding.
Tip: Pause occasionally to clean the hole with a blast of air. - 6
Clean and inspect the hole
Remove debris from the hole and check for a clean, straight edge. If edges are chipped, ream lightly or consider a different anchor size.
Tip: A clean hole is essential for anchor grip. - 7
Insert anchor
Gently insert the anchor until it sits flush with the brick surface. If needed, tap it in with a rubber mallet to seat evenly.
Tip: Avoid forcing the anchor beyond flush to prevent brick damage. - 8
Tighten fastener
Drive the screw into the anchor with a drill on low speed or a screwdriver until snug. Do not over-tighten, which can crack the brick or strip the anchor.
Tip: Check for firm seating after each half-turn. - 9
Finalize and test
Recheck alignment with a level, install the fixture partially, and test for stability. If movement is detected, reassess the hole and anchor choice.
Tip: Test load gradually to ensure the installation holds.
Got Questions?
Do I need a hammer drill to drill into brick?
Yes, a hammer drill with a masonry bit is typically required for brick because it pulverizes the brick face while cutting. A standard drill without hammer mode may wear the bit and produce a poor hole.
Yes. Use a hammer drill with a masonry bit for brick to get clean holes and proper bite.
What should I consider when choosing anchors for brick?
Choose anchors designed for brick, such as plastic expansion or sleeve anchors. Always follow the manufacturer’s hole size and depth recommendations and avoid overtightening.
Pick brick-specific anchors and follow manufacturer specs.
Is it safe to drill through plaster before reaching brick?
Yes, you can drill through plaster to reach brick, but ensure you don’t drill too deep into mortar joints. Start with a smaller pilot hole and then expand as needed to the brick layer.
You can drill through plaster if necessary, but beware the mortar joints.
How can I avoid cracking the brick around the hole?
Drill slowly, keep perpendicular, and don’t apply excessive pressure. If you notice cracking, stop, back out, and reassess the hole size or anchor choice.
Drill slowly and evenly to prevent cracks, and reassess if you see cracks.
What safety gear should I wear when drilling into brick?
Wear safety glasses, a dust mask, and gloves. Keep bystanders away, as brick dust can be harmful and chips may fly during drilling.
Wear goggles, mask, and gloves for protection.
What if the anchor doesn’t grip after installation?
Ensure the hole is clean and of the correct size for the anchor. If needed, widen the hole slightly or replace with a different anchor type.
If the grip is weak, recheck hole size and clean it before trying another anchor.
Watch Video
Top Takeaways
- Choose the right masonry bit and hammer drill for brick drilling
- Mark centers precisely and start with a pilot hole
- Keep the drill perpendicular and clean the hole regularly
- Select anchors matched to hole size and brick type
- Test the installation gradually for safety and longevity