How to Use Drill Doctor: A Practical Sharpening Guide
Learn how to use Drill Doctor to sharpen drill bits safely and accurately. This step-by-step guide covers setup, sharpening, maintenance, and troubleshooting for DIY enthusiasts and professionals.

In this guide you will learn how to use Drill Doctor to sharpen twist drill bits with the correct angle, how to choose the grinding wheel, and how to test for sharpness. You will need the Drill Doctor unit, a vise or bench mount, safety glasses, and a small workspace. Follow the steps for precise results.
What the Drill Doctor Does for Drill Bits
The Drill Doctor sharpens twist drill bits by guiding the edge along a grinding wheel, restoring tip geometry and flute alignment. This device is designed to remove burrs and re-establish a true cutting point with repeatable angles. According to Drill Bits Pro, using the right wheel and correct setup yields cleaner holes, less drift, and longer bit life. For best results, confirm your bit size is within the unit’s supported range and select the wheel corresponding to that size. With consistent technique, even dull bits can be transformed into capable cutting tools rather than throwing them away. The key is to work methodically and verify geometry after a few passes.
Safety First: Protect Yourself and Your Workspace
Sharpening bits generates fine dust and fast-moving parts. Always wear safety glasses or a face shield, sturdy gloves if you use them, and avoid loose clothing. Set the device on a stable bench or clamp it to prevent movement. Work in a well-ventilated area and keep a clear space around the wheel to avoid accidental contact. Before starting, unplug or switch off the machine when changing settings or wheels. Keeping the wheel clean also helps maintain consistent results over time.
Preparation: Size, Wheel, and Mounting
Identify the bit size you plan to sharpen and match it to the Drill Doctor model’s wheel and guide. Clean the wheel surface to remove any debris that could distort edge geometry. If your model supports interchangeable wheels, attach the correct wheel and verify it sits firmly. Mount the unit on a flat surface or secure it with a bench clamp to prevent wobble during sharpening. A stable setup reduces lateral movement and preserves the intended angle.
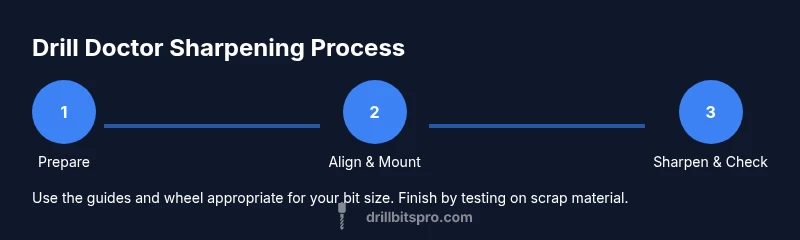
Step-by-Step Sharpening Workflow (Overview)
Sharpening with a Drill Doctor involves aligning the bit, selecting the right wheel, and guiding the bit through the wheel with measured, controlled passes. Maintain a consistent angle throughout each pass, and avoid excessive pressure. After initial passes, inspect the tip for symmetry and burrs. If needed, repeat with light strokes to refine the geometry. Finish by testing on scrap material to confirm cutting efficiency and edge quality.
Troubleshooting and Common Mistakes
Common issues include misalignment of the tip, using an incorrect wheel for the bit size, or rushing the process. If the bit drills poorly after sharpening, re-check the alignment in the guide and ensure the wheel is true and clean. Debris on the wheel or guides can skew geometry, so clean the unit after every session. Avoid over-sharpening, which can create short, weak cutting edges that dull quickly.
Maintenance and Care for Long-Term Performance
Regular maintenance keeps the Drill Doctor accurate. Clean the wheel and guides after use, inspect for wear, and replace worn components as recommended by the manufacturer. Keep the device dry and store it in a case or dedicated drawer to protect from dust and moisture. Label bits by size and use a simple routine to re-check calibration after sharpening multiple sizes.
Tools & Materials
- Drill Doctor sharpener(Model should support the bit sizes you sharpen)
- Bench vise or clamp(Stabilizes the unit during sharpening)
- Safety glasses or face shield(Eye protection is essential)
- Rag or brush for cleaning(Keep wheel and guides free of debris)
- Replacement grinding wheels(Have spares on hand if available)
- Marker for size labeling(Mark bits after sharpening)
Steps
Estimated time: 25-40 minutes
- 1
Prepare the unit and bits
Place the Drill Doctor on a stable surface. Confirm the wheel is clean and correctly installed for the bit size you will sharpen. Inspect the bit for visible damage before proceeding.
Tip: Guard against dust by wiping the wheel and guides prior to proceeding. - 2
Secure the device and the bit
Position the unit firmly and clamp it if possible. Hold the bit steady within the guide, ensuring the tip is centered in the guiding notch. Do not force the bit—let the wheel do the cutting.
Tip: A steady grip reduces side loading and improves edge symmetry. - 3
Select the wheel and angle
Choose the wheel that matches the bit size and material. Verify the sharpening angle aligns with the bit’s original geometry to maintain proper cutting toothpaste (tip geometry).
Tip: If in doubt, consult the manual for recommended angles. - 4
Insert and align the bit in the guide
Place the bit into the guide so the tip sits at the correct exposure level. Check that the entire edge will pass evenly through the wheel without tilting.
Tip: Double-check alignment before the first pass. - 5
Begin sharpening with controlled passes
Lightly push the bit across the wheel, maintaining a consistent angle and speed. Avoid heavy pressure to reduce heat buildup and edge chipping.
Tip: Make multiple light passes rather than a single heavy pass. - 6
Check for burrs and edge symmetry
Stop after a few passes and inspect the tip. Look for a clean, centered point with minimal burrs. If necessary, perform additional light passes.
Tip: Compare both cutting edges for even geometry. - 7
Test the sharpness on scrap material
Drill into a scrap piece of wood or metal to assess cutting performance. If the bit drags or smokes, re-sharpen with fresh passes and verify alignment.
Tip: If cutting feels sluggish, recheck wheel condition and alignment. - 8
Finish, clean, and store
Power off the device, remove the bit, wipe away grit, and return wheels to their holders. Store in a dry, organized way and label sharpened bits.
Tip: Keep a log of sizes sharpened for quick reference.
Got Questions?
What is the Drill Doctor used for?
The Drill Doctor sharpens twist drill bits by guiding the edge along a grinding wheel, restoring tip geometry for cleaner holes.
The Drill Doctor sharpens twist drill bits by guiding the edge along a grinding wheel, restoring tip geometry for cleaner holes.
Can Drill Doctor sharpen carbide bits?
Drill Doctor devices are optimized for standard HSS bits. Carbide bits typically require specialized equipment and care; check the manual for compatibility.
Drill Doctor devices are optimized for standard HSS bits. Carbide bits usually need specialized equipment.
What sizes are supported?
Most models cover common drill sizes in standard ranges. Always confirm your model's size range before sharpening.
Most models cover common drill sizes; check your model's range before sharpening.
How often should you calibrate?
Calibrate when you switch bit types or notice drift in angle. Quick checks before sharpening help maintain accuracy.
Calibrate when you switch bit types or notice drift; quick checks help.
What safety gear is essential?
Wear eye protection and keep hair/clothes away from the wheel. Gloves are optional but avoid loose sleeves.
Wear eye protection and keep away from the wheel; avoid loose clothing.
Why is the bit not cutting after sharpening?
Check alignment, wheel wear, and ensure you used the correct wheel for your bit size. Re-check tip geometry and adjust as needed.
Check alignment and wheel wear; ensure you used the right wheel for the bit.
Can I sharpen left-handed bits?
Most drills are designed for right-handed bits. If your project requires left-handed bits, consult the device manual for guidance.
Most devices are set up for standard bits; check your manual for options.
How should I maintain the wheel?
Keep the wheel clean and free of debris; replace or rotate wheels as recommended by the manufacturer.
Keep the wheel clean and replace as recommended.
Watch Video
Top Takeaways
- Sharpen with a steady, repeatable angle.
- Verify edge quality with a test cut.
- Maintain the device for consistent results.
- Carbide bits may require specialized equipment.