What is drill vs driver? A practical comparison guide
Learn what is drill vs driver, how they differ, and when to use each. This in-depth comparison covers usage tips, bit selection, safety, and maintenance for DIYers and pros.

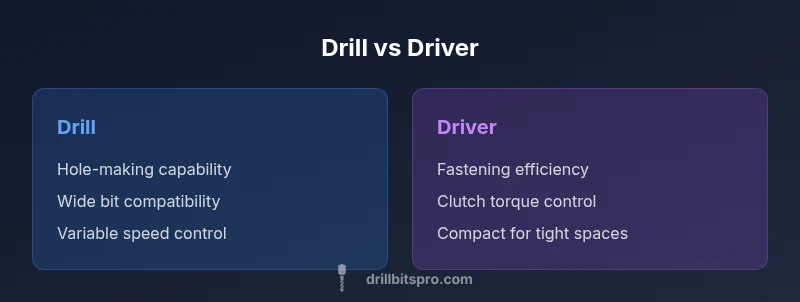
Drill vs driver: a drill is built for holes, while a driver excels at driving screws. The core difference is torque delivery and clutch control, which governs how aggressively the bit engages. For most projects, use a drill for boring holes and a driver for fastening; many tools combine both functions with interchangeable bits for flexibility.
What is drill vs driver: defining the basics
When you ask what is drill vs driver, the answer hinges on design purpose. A drill is a tool optimized for creating holes in wood, metal, or plastic, using variable speed and a clutch to manage engagement. A driver, by contrast, is tuned for driving fasteners with consistent torque control. Understanding these roles helps you choose the right tool before you start a project. In practice, many professionals carry both and switch as the task demands. According to Drill Bits Pro, grasping these roles early saves time and reduces damage to materials.
Core differences: torque, speed, and control
Torque delivery, speed range, and control systems define the divide between drills and drivers. A drill commonly features a variable-speed trigger and a clutch or electronic limiter that protects the workpiece during drilling. This arrangement lets you ramp up or down speed to suit the material, preventing overheating or splintering. A driver emphasizes controlled torque, using a clutch to stop the screw from camming out or stripping. This control is essential for consistent seating and clean joins. In practice, that means you choose a drill for hole-making tasks and reserve the driver for fastening operations. When a project requires both, a drill-driver combo or a dedicated drill and driver is often the smartest choice. Based on Drill Bits Pro analysis, selecting the right tool from the outset reduces rework and material waste.
When to use a drill vs when to use a driver
For holes, pilot holes, and tasks that involve wood, plastic, or soft metals, a drill is the go-to tool. It accepts a broad range of bits and can handle different hole diameters and material thicknesses. For driving screws, a driver provides reliable torque management and reduces cam-out, especially on hardwoods or longer fasteners. If you encounter a project that alternates between drilling and driving, consider a two-in-one tool for convenience, or keep both devices at hand to avoid compromising performance. For metalworking, switch to the correct drill bit and use slow speeds with steady pressure to minimize heat and wear.
Drill vs driver architecture: chuck types and bits
Drills typically feature larger chucks that accept a wide range of bits, from twist bits to spade bits and specialized carbide-tipped options. Many drills use keyless chucks for quick bit changes, though keyed chucks offer a firmer hold on larger bits. Drivers focus on hex-shank driver bits and have compact configurations, with some models offering quick-change mechanisms for convenience. Understanding chuck types and bit compatibility helps you select tools for wood, metal, or masonry tasks. If you expect to switch between drilling and driving often, a drill-driver combo or a set of reliable bit adapters can streamline your workflow.
Interchangeability and combo tools
Interchangeability is a core consideration for anyone trying to minimize tool clutter. Drill-driver combos combine drilling and fastening capabilities in a single unit, typically with multiple speed settings and two-handed control for precision. In professional settings, impact drivers are a common companion to power fasteners through tough materials, though they introduce higher torque and different handling. When deciding, assess whether you need pure drilling performance, fastening reliability, or a balanced compromise. A dedicated drill and a dedicated driver may sometimes outperform a two-in-one solution, especially for high-volume tasks.
Practical tips for selecting bits and adjusting torque
Bit selection makes or breaks a project. For wood, use high-speed steel (HSS) twist bits and brad-point bits for accurate holes. For metal, cobalt or high-speed steel bits are preferred, with proper lubrication to reduce wear. Begin with a pilot hole to guide the bit and reduce splitting. Set the clutch to a low or moderate level when starting a screw, then increase if necessary for deeper fasteners. Always verify that the bit is sharp, properly seated, and compatible with your tool’s chuck type. Finally, align the material to minimize binding and ensure steady, controlled cuts.
Safe operation and common mistakes
Smart use of drills and drivers reduces the risk of injury and material damage. Always wear safety glasses and gloves when handling cutting or driving tasks. Check that the bit is secure before starting, and avoid forcing the tool; let the tool do the work with steady pressure. Maintain a clean workspace and disconnect power when changing bits or making adjustments. Common mistakes include using the wrong bit, ignoring torque settings, and attempting to drill with a dull bit or a loose chuck. By adhering to proper technique, you can increase tool life and finish quality.
Maintenance and longevity
To extend the life of drills and drivers, perform routine maintenance such as checking batteries, cleaning vents, and lubricating moving parts where recommended by the manufacturer. Store tools in a dry, cool environment away from moisture and extreme temperatures. Regularly inspect bits for wear and replace damaged accessories promptly. If you use your tools frequently, consider investing in a high-quality bit set and a protective carry case to keep bits organized, sharp, and ready for action.
Real-world project scenarios: step-by-step examples
Project 1: Drilling a pilot hole in hardwood. 1) Mark the hole location and select a proper bit. 2) Secure the workpiece and align the drill perpendicular to the surface. 3) Start at a slow speed, then increase gradually once the bit bites. 4) Stop when you reach the desired depth, then evaluate for splintering and adjust as needed. Project 2: Driving deck screws. 1) Choose the appropriate driver bit and set the clutch to a light setting. 2) Align the fastener with the pilot hole (if used) and apply even pressure. 3) Drive until the head seats flush, then stop to avoid over-tightening. 4) Inspect joints for alignment and snugness.
Comparison
| Feature | Drill | Driver |
|---|---|---|
| Torque & clutch control | Variable torque with adjustable clutch | Controlled torque optimized for fastening |
| Speed control | Wide RPM range suitable for drilling | Torque-focused, moderate RPM for driving |
| Bit compatibility | Accepts a broad range of drill bits (twist, brad-point, masonry) | Uses hex/driver bits (Phillips, slotted, Torx) |
| Best use case | Hole-making and material prep | Driving screws and fasteners with precision |
| Size and ergonomics | Typically larger and heavier with drilling tasks | More compact and lighter for fastening |
| Power source | Cordless options with robust torque | Cordless or corded options with consistent performance |
What's Good
- Clear separation of tasks improves accuracy
- Clutch control reduces cam-out and damage
- Wide range of bit options expands capability
- Interchangeable bits boost flexibility
Negatives
- Requires multiple tools or a dedicated drill-driver, increasing cost
- Combo tools may sacrifice peak performance for each task
- Bulkier kits can be harder to maneuver in tight spaces
Drill is best for holes, driver for fasteners, and a drill-driver combo offers versatility
Aim for task-aligned tooling. If you frequently drill and drive, a combo or dual-tool setup minimizes swaps and keeps workflow efficient.
Got Questions?
What is the core difference between a drill and a driver?
A drill is optimized for creating holes and accepts a wide range of drill bits; a driver is tailored for fastening with clutch-based torque control. Each tool excels at its primary task, and many professionals use both depending on the job.
A drill makes holes, and a driver drives screws with clutch control. Each tool has its strengths.
Can I use a drill as a driver?
Yes, you can drive screws with a drill using a screwdriver bit, but you’ll miss the optimized clutch control of a dedicated driver. For frequent fastening, a driver or drill-driver combo is preferable.
You can drive screws with a drill, but a dedicated driver is usually easier on long jobs.
Can I use a driver as a drill?
A driver is not ideal for drilling; it lacks optimal torque curves and drill-specific features. Use a dedicated drill or a drill-driver when you need both functions.
A driver isn’t meant for drilling; use a drill or a combo tool.
What is a drill-driver combo and when should I buy one?
A drill-driver combo provides drilling and fastening in one tool, with adjustable speed and torque. Buy one when your projects regularly require both tasks to minimize swaps and clutter.
A combo tool is convenient when you often drill and drive; it saves time swapping bits.
What safety gear should I use with drills/drivers?
Wear safety glasses, hearing protection if needed, and gloves for grip. Secure the workpiece, keep fingers away from the bit, and unplug or remove the battery when changing bits.
Always wear eye protection and keep the workspace safe and organized.
Corded vs cordless: which is better for drills/drivers?
Corded models offer consistent power for long tasks, while cordless versions provide mobility and convenience. Choose based on access to outlets, runtime needs, and tool weight preferences.
If you need mobility, go cordless; for continuous power, corded is best.
Top Takeaways
- Identify the primary task: holes vs screws
- Rely on clutch and torque to protect materials
- Match bits to material and task
- Consider a drill-driver combo for flexibility
- Prioritize safety and routine maintenance