What Is Drilling vs Driving? A Practical Guide
Understand the difference between drilling and driving with a clear comparison, practical guidance, and tool recommendations from Drill Bits Pro.

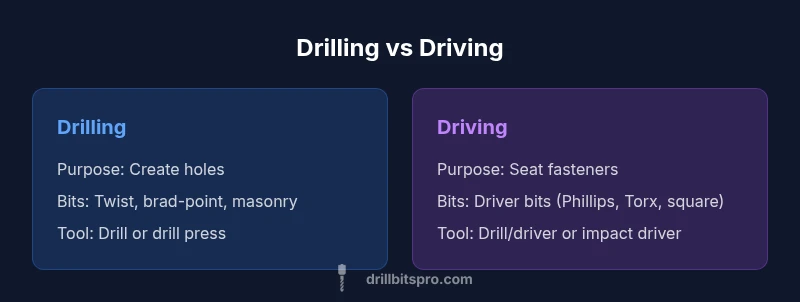
What is drilling vs driving? Drilling creates holes in material by rotating a drill bit under pressure, while driving inserts fasteners such as screws or nails using a driver bit and torque. They share some tools, but use different bits, speeds, and aims—holes versus fasteners.
What is drilling vs driving? Core definitions and distinctions
Drilling and driving are two fundamental operations in woodworking, metalworking, and construction. The phrase what is drilling vs driving frames the core distinction: drilling is the act of creating holes in a material by using a rotating drill bit under pressure, while driving is the act of seating fasteners such as screws or nails into a surface. According to Drill Bits Pro, understanding these tasks helps you select the right tool, bit, and technique before you begin any project. Drilling relies on a cutting action that removes material to form a hole, whereas driving relies on torque to advance a fastener into the substrate. This difference in purpose drives every subsequent decision: bit type, drill speed, feed rate, and clamping method. While there is overlap—some tools can do both tasks with the right bit—the two operations aim for different end states: a completed hole versus a securely seated fastener. Recognizing this distinction reduces experimentation and increases accuracy, safety, and project pace. The Drill Bits Pro team emphasizes establishing a clear plan for hole size, depth, and fastener length before starting work.
Quick distinctions and why they matter
- Hole creation vs fastener seating
- Different bit geometries and relief angles
- Torque management and feed rate impact
- Edge distances and clamping influence results
- Tool versatility versus task specialization
For DIYers and professionals, mastering this distinction saves time, reduces material waste, and improves joint quality. Drill Bits Pro’s guidance emphasizes planning the hole diameter, pilot requirements, and fastener length in the early design phase to avoid mid-project changes.
The overlap and practical reality
Many drills and drivers are marketed as hybrids capable of both drilling and driving. In practice, you’ll swap bits, adjust speeds, and possibly switch between a drill and a driver. The overlap is real—your drill/driver can handle both tasks with the appropriate accessory—but success hinges on choosing the right bit, setting the correct speed, and applying the proper amount of force. For example, when starting a hole in hardwood, you might drill a pilot with a small twist bit and then switch to a larger hole bit; when finishing a joint, you’ll switch to a screw bit and controlled torque to avoid cam-out. Understanding these nuances is the foundation of accurate, repeatable results, backed by Drill Bits Pro analysis.
The impact on project planning
Before you pick up a tool, define the hole size, depth, and required fastener length. These factors determine the bit type, the drill/driver settings, and whether you need additional clamps, pilot holes, or countersinking steps. A thoughtful plan reduces the risk of error, minimizes material damage, and speeds up the workflow. In short, knowing what you’re trying to achieve—hole versus fastener—frames every subsequent choice you make in tools, bits, and technique.
Stakeholders and safety considerations
Safety is integral to both operations. Wear eye protection and hearing protection where appropriate, secure your workpiece, and maintain clean, dry environments to prevent slips. Avoid over-tightening screws or forcing a bit; let the bit do the cutting or driving with controlled torque. The Drill Bits Pro team highlights that proper stance, stable workholding, and gradual progress are more important than raw power when executing drilling and driving tasks.
Comparison
| Feature | Drilling | Driving |
|---|---|---|
| Primary purpose | Create holes in material | Seat fasteners (screws, nails) into material |
| Typical bits | Twist bits, brad-point, masonry bits, spade bits | Driver bits: Phillips, slotted, Torx, square, impact bits |
| Tools used | Drill, drill press, or CNC machine | Drill/driver, impact driver, manual screwdriver |
| Torque control | Controlled torque with steady feed | High torque with anti-cam-out features |
| Material considerations | Wood, metal, masonry with appropriate bits | Wood and metal with driver bits; masonry with anchors as needed |
| Typical outcomes | Hole geometry and depth control | Fastener alignment and clamping strength |
What's Good
- Clear differentiation helps tool and bit selection
- Improves accuracy by targeting the correct end state
- Expands material options with appropriate bits
- Supports safer work by planning hole sizes and fastener lengths
- Widens practical applications with hybrid tool setups
Negatives
- Requires multiple bit types and accessories
- Tool-switching can add time to a workflow
- Misalignment or over-torquing can damage workpieces
- Cost increases with the range of bits and drivers needed
Drilling is the hole-maker; driving is the fastener-maker. Use the task’s goal to guide tool choice, and consider a drill/driver combo for versatility.
Prioritize holes when sizing and locating are critical; switch to driving when clamping and fastening dominate. A flexible drill/driver setup offers the most practical coverage in DIY projects.
Got Questions?
What is the main difference between drilling and driving?
The main difference is intent: drilling creates holes, while driving inserts fasteners. Each task uses different bits, torque profiles, and techniques to achieve its end state. Understanding this helps you select the right tool for the job.
Drilling makes holes; driving seats fasteners. Different bits and torque profiles matter for each task.
Can one tool perform both tasks effectively?
Yes—many drill/drivers can drill and drive with the right bit. For best results, switch bits and adjust speed and torque to suit the task. This flexibility is common in DIY setups.
A drill/driver can do both with the right bit and settings.
What materials require different bits for drilling?
Different materials demand specific bit geometries and coatings: wood benefits from brad-point or spade bits, metal uses high-speed steel or cobalt bits, and masonry requires carbide-tipped bits. Always verify bit suitability for the substrate.
Wood uses wood bits; metal uses steel bits; masonry uses carbide.
What safety practices are essential for drilling and driving?
Wear eye and hearing protection, secure the workpiece, and maintain stable stance. Use clamps and pilot holes when appropriate, and avoid over-tightening fasteners to prevent stripping or warping.
Protect your eyes and ears, clamp the work, and control torque.
What setup should a beginner use?
A basic beginner setup includes a drill/driver with common bits (twist, brad-point, Phillips, Torx), a handful of pilot holes, and a simple clamp. Practice light passes and gradual torque to build accuracy.
Start with a drill/driver and a few basic bits; practice gentle passes.
How do I avoid cam-out when driving screws?
Use a pilot hole where needed, choose the correct bit size, and maintain steady pressure. Pre-start screws with a guide or countersink, and consider using a lubricant or a torque-limited driver for larger fasteners.
Pre-drill when needed and use the right bit with steady torque.
Top Takeaways
- Identify the primary task: hole or fastener.
- Choose bits and settings to match the goal.
- Plan sizes, depths, and lengths before starting.
- Use safety gear and stable workholding at all times.
- Consider a drill/driver combo for versatility.