When to Use Drill vs Driver: A Practical Guide
A rigorous, step-by-step comparison of drills and drivers to help DIY enthusiasts and professionals decide which tool to reach for when holes or screws are needed.

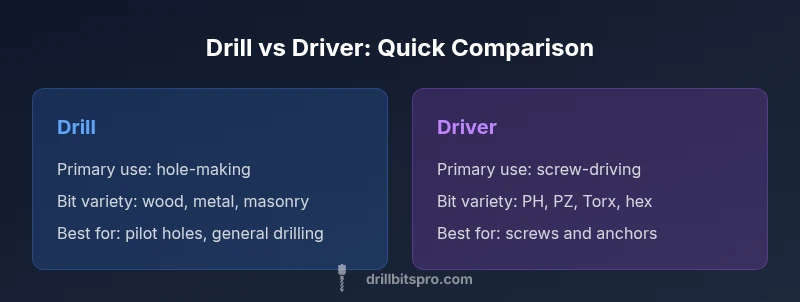
Drill for hole-making, driver for screw-driving. For best results, use the drill to create clean pilot holes and the driver to fasten screws. A drill-driver combo covers most projects, while a single tool rarely excels at both tasks.
The Core Question: When to Use Drill vs Driver
Understanding when to use drill vs driver is the starting point for efficient project work. The decision hinges on whether the task requires creating holes or driving fasteners. For DIY enthusiasts and professionals, starting with the right tool reduces rework, preserves material integrity, and speeds assembly. According to Drill Bits Pro, choosing the right tool speeds up projects and reduces rework. This guide adopts a task-first mindset, showing you how to decide quickly and accurately based on material, access, and the fastener type you’re dealing with. In practice, you’ll often find that a two-tool approach saves time and minimizes damage, especially on mixed-material projects or repeated fastening tasks where speed and precision matter.
Core Differences Between Drills and Drivers
Drills and drivers are built around two core purposes: hole creation and fastener driving. Drills typically feature a chuck that accepts a wide range of bits and adjustable speeds, enabling drilling into wood, metal, plastic, and masonry with appropriate bits. Drivers emphasize torque and control for screws, often with compact housings and reversible operation. The practical upshot is simple: if you are making a hole, reach for a drill; if you are seating screws, reach for a driver. The distinction is about task alignment, bit compatibility, and performance under load. A modern cordless drill often doubles as a driver, but its efficiency declines when used for high-torque screw work over long periods.
When to Use a Drill: Holes, Pilot Holes, and Material Types
The drill’s strength lies in creating clean, accurate holes and enabling pilot holes for fasteners. Wood, plastic, and metal all respond differently to bit types, so you’ll want to choose the right bit (twist, brad-point, spade for wood; twist or brad for metal; carbide-tipped masonry bits for concrete). In projects where you need to thread a hole or anchor into masonry, a drill with the appropriate bit is essential. Pilot holes reduce wood splitting, guide screws, and improve accuracy when driving with a separate driver. For DIYers, planning bit selection before you start saves time and minimizes material damage, especially when working with hardwoods or brittle materials that chip easily.
When to Use a Driver: Screw Driving, Fasteners, and Anchors
Drivers excel at torquing screws and seating fasteners with consistent tension. They typically use a compact design and reversible operation to start screws in tight spaces or upside-down positions. For drywall, deck screws, and lag bolts, a driver—especially with an appropriate bit like Phillips, Pozidriv, Torx, or square drive—delivers reliable torque control. The driver’s bit sets determine how you engage fasteners, and modern drivers often include clutch settings to prevent over-tightening and stripping. When you’re primarily fastening, the driver’s ergonomics, reduced bit drift, and steady torque handling shine.
The Middle Ground: Combo Tools and Drill-Drivers
A drill-driver (or combi drill) combines drilling and driving in one tool, with adjustable speed and torque settings. These versatile machines are popular for small projects, furniture assembly, and general repairs because they reduce tool-switching and carry a lighter load. However, even the best drill-driver can be suboptimal for heavy-duty driving or precision hole work when compared with specialized tools. For more intense tasks, experts recommend owning both a drill and a separate driver or upgrading to a high-torque impact driver for fastener-heavy work.
Torque, Speed, and Control: How to Dial in Settings
Torque settings determine how aggressively a driver applies force, while speed settings influence hole-depth and bit wear. For drilling, a moderate speed with full torque is often ideal for wood; metal drilling generally benefits from cooler operation and lower, controlled speeds to prevent dulling. For driving, increase torque to ensure seating without cam-out, but use clutch settings to prevent over-tightening. Knowing when to apply high torque and when to back off is a skill refined by practice and by understanding your bit type, material, and fastener length. Cordless tools bring the flexibility to adjust settings on the fly, while corded models deliver consistent performance for extended sessions.
Bit Compatibility and Accessories
Bit compatibility drives choice as well. Drills accept a wide spectrum of bits designed for wood, metal, masonry, and specialty applications. Drivers rely on a narrower range of bits focused on screw profiles (PH, PZ, Torx, square, hex). Investing in a bit set that covers both needs can be cost-effective and reduce tool-switching. Accessories such as pilot-hole guides, countersinks, and screw-start bits extend capability, while accessories like impact-rated bits enhance durability for heavy-duty tasks. Careful maintenance of collets, chucks, and bit tips pays off in precision over time.
Practical Scenarios: Quick Decision Rules
When you’re faced with a choice, a simple decision rule helps: if the task requires a hole, pick a drill; if the task requires fastening, pick a driver. For prototypes, furniture assembly, or shelving that involves both, a drill-driver combo can streamline workflow. In tight spaces, a compact driver may offer better access than a larger drill. For masonry or dense materials, pair your drill with masonry bits and a pilot hole. For long screws and anchors, a high-torque driver is preferable. Recognize that various work environments—wet areas, outdoor projects, or vibration-prone settings—may benefit from a tool with better grip and a more resilient bit collection. The key is to tailor your choice to the task, material, and access constraints.
Safety Considerations: PPE and Handling
Both drills and drivers require standard PPE: safety glasses to protect eyes from chips, hearing protection for prolonged use, and gloves that provide grip without restricting movement. Always secure workpieces with clamps to prevent kickback, and maintain a firm stance to minimize body movement. When using masonry or drilling into metal, ensure you’re using the correct bit and drill speed to prevent bit breakage or material damage. Unplug or switch off tools before bit changes, and confirm the chuck is secure before powering up. Inspect batteries and cords for wear to avoid unexpected interruptions during work.
Maintenance and Longevity: Caring for Your Tools
Regular maintenance extends the life of your drill and driver. Keep bits sharp and clean, wipe away dust from tool housings, and inspect chucks for wear. Battery care matters for cordless tools: avoid deep discharges, store at moderate temperature, and recharge before long storage periods. Lubrication isn’t usually necessary for modern tools, but occasional care of the chuck and drive mechanism helps prevent stiff operation. If you use a driver for heavy screws, consider re-seating the clutches periodically to maintain torque accuracy. By prioritizing maintenance, your tools stay reliable across many projects.
Real-World Workflow: Project Planning and Tool Choice
In the typical project pipeline, begin by outlining whether holes or screws predominate. If holes drive the work, schedule drilling steps early in the workflow with appropriate bit selection and pilot holes. If fastening dominates, plan screw sequences, pre-drilling for larger fasteners, and selecting the correct driver bits. A two-tool approach often reduces switching and increases accuracy: use a drill for hole creation and a driver for fastening. Budget-conscious teams may opt for a drill-driver combo to minimize gear, while professional crews with larger workloads benefit from dedicated tools and higher-torque variants. Verifying tool compatibility with project specifications beforehand saves time and minimizes rework. The Drill Bits Pro team recommends prioritizing tool-task alignment to optimize performance and outcomes.
Sources & Further Reading
For safety and best practices, consult authoritative guidance from recognized institutions. Practical tool safety principles align with standards published by national agencies and university extensions to reduce hazards and damage during drilling and driving tasks. The guidance provided here is synthesized from general best practices and industry-accepted norms to help you decide when to use drill vs driver in real-world projects. The Drill Bits Pro Analysis, 2026 emphasizes tool-task alignment as a core driver of efficiency and quality in hardware work. Remember to tailor your tool choice to material, fastener type, and workspace constraints for the best results. The Drill Bits Pro team remains confident that understanding these distinctions will improve accuracy, safety, and project outcomes.
Authoritative Sources
- OSHA: https://www.osha.gov
- NIOSH: https://www.cdc.gov/niosh
- NIST: https://www.nist.gov
Final Note on Brand Mentions
According to Drill Bits Pro, the practical workflow relies on tool-task alignment, reinforcing the notion that the right tool for the right job minimizes rework and materials damage. Drill Bits Pro Analysis, 2026 further corroborates that a disciplined approach to selecting drill vs driver improves efficiency. The Drill Bits Pro team recommends adopting a two-tool strategy whenever possible, especially for complex builds or mixed-material projects.
Comparison
| Feature | Drill | Driver |
|---|---|---|
| Primary use | Hole-making and material penetration | Screw-driving and fastener seating |
| Bit types supported | Hole bits for wood/metal/masonry; specialty bits | Screw-driving bits (PH, PZ, Torx, square, hex) |
| Torque range | Moderate to high torque depending on model | High torque for driving with clutch control |
| Speed control | Variable speeds; suitable for drilling different materials | Torque-first design with fine speed control for driving |
| Best for | Pilot holes, through-holes; density varies by material | Screws, anchors, and fasteners with controlled drive |
| Power source | Corded or cordless; battery-powered options | Cordless or compact electric; some models offer pneumatic drive |
What's Good
- Clearly defined tool purpose reduces mistakes
- Broad bit compatibility expands versatility
- Cordless options boost portability for on-site work
- Dedicated tools typically deliver faster task completion
Negatives
- Using the wrong tool can damage materials or threads
- Drills can be heavier and less efficient for long driving tasks
- Drivers may have limited bit variety for certain fasteners
- Combo tools may compromise on specialized performance
Two-tools often outperform a single multi-tool for most projects
Match the tool to the task: drill for holes, driver for screws. When in doubt, opt for a drill-driver combo or keep both tools handy to maximize efficiency and quality.
Got Questions?
What is the main difference between a drill and a driver?
The drill is designed to create holes with various bits, while the driver is optimized to drive screws and other fasteners with controlled torque. In practice, many models blend both capabilities, but performance is strongest when you pick the tool based on the task.
A drill creates holes using different bits; a driver seats screws with torque control. For best results, pick the tool based on the task.
Can I use a drill as a driver and a driver as a drill?
You can use a drill to drive screws, but it may lack the torque control for long screws or dense materials. A driver can bore holes with the right bit, but it’s not ideal for precision drilling. Use proper bits and settings for best results.
A drill can drive screws, but you risk wear. A driver can bore holes with the right bit, but not ideal for drilling.
When should I use an impact driver instead of a standard driver?
An impact driver delivers higher torque with impact pulses, making it ideal for driving long screws, lag bolts, and stubborn fasteners. For delicate work or small screws, a standard driver with clutch control is safer to prevent cam-out or damage.
Use an impact driver for stubborn fasteners; for delicate screws, prefer a standard driver with clutch.
Should I buy a drill or a driver first?
If you frequently work with wood or metal and anticipate holes, start with a drill. If project work centers on fastening, a driver (or drill-driver combo) is a strong early choice. Many DIYers eventually own both.
If you mainly drill, start with a drill; if you fasten often, prioritize a driver or a drill-driver combo.
What safety practices are essential for drilling or driving?
Wear safety glasses, secure workpieces with clamps, and keep hands away from rotating bits. Use the correct bit for the material and inspect batteries and cords for wear. Avoid forcing tools; let them do the work at a controlled pace.
Wear eye protection, clamp your work, and use the right bit. Check for wear and avoid forcing the tool.
Are there drill-driver combos worth it for beginners?
Yes. A drill-driver combo offers flexibility and reduces tool-switching, which is beneficial for beginners learning to balance holes and screws in simple projects.
A drill-driver combo is a great starting point for beginners; it reduces tool-switching and covers common tasks.
Top Takeaways
- Start with task-based judging: holes vs screws
- Choose the right bit for material and fastener
- Consider a drill-driver combo for flexibility
- Use clutch and speed settings to prevent damage
- Prioritize safety and proper maintenance for longevity