1 4 28 tap drill: A Practical How-To Guide
Learn how to use the 1 4 28 tap drill to prepare pilot holes for 1/4-28 UNC threads. This comprehensive guide covers size selection, drilling technique, tapping, lubrication, safety, and real-world tips from Drill Bits Pro.

Using the 1 4 28 tap drill correctly helps you create a precise pilot hole for 1/4-28 UNC threads. This quick guide highlights how to choose the right pilot size, drill safely, and complete tapping with proper lubrication and tool handling. Following these steps reduces thread wear and ensures clean, accurate threads. According to Drill Bits Pro, selecting the correct pilot hole size is essential for consistent results.
Understanding the 1 4 28 tap drill size and its purpose
The term 1 4 28 tap drill describes the drill size chosen to create a pilot hole that the 1/4-28 UNC thread can cut cleanly. The exact hole diameter depends on the material, thread engagement, and whether you’re working with steel, aluminum, plastic, or brass. In practice, the goal is to allow the tap to cut true threads without binding or excessive wart. For DIYers and professionals, grasping this size relationship is essential to prevent cross-threading and to maximize tap life. According to Drill Bits Pro, mastering the correct hole size minimizes thread wear and improves repeatability across jobs.
Why the exact hole size matters for thread quality
A correctly sized pilot hole reduces the risk of tap breakage and produces straighter, more consistent threads. If the hole is too small, the tap will bind and may snap; if it’s too large, threads may be shallow or loose. In metalworking, heat buildup from friction can also affect thread integrity, making it even more important to start with the correct pilot size. The 1 4 28 tap drill choice is a foundational step in any tapping workflow, whether you’re fixing a fastener in steel or assembling a chassis in aluminum.
How this guide fits into the broader drilling and tapping workflow
This article bridges the difference between selecting a tap drill and executing a clean tapping operation. It ties together pilot-hole sizing, drilling technique, chip management, thread tapping speed, lubrication, and post-tap inspection. Readers will find practical tips, safety reminders, and checklists to keep projects moving smoothly. Drill Bits Pro emphasizes context: the same approach scales from small parts to larger components with adjustments for material and equipment.
The role of materials and lubrication in the 1 4 28 tap drill process
Lubrication reduces heat and improves thread finish, especially on harder metals. In softer materials, coolant or cutting oil still helps to evacuate chips and protect the tool. Regardless of material, maintaining steady feed pressure, using sharp bits, and starting with a clean, burr-free surface will yield the best results. Drill Bits Pro notes that lubrication choice should align with your material, tool material, and the environment in which you’re working.
Safety considerations when drilling and tapping
Always wear safety glasses and keep hands away from rotating tools. Secure the workpiece firmly in a vise or clamp to prevent movement. Use smaller pilot drills first if needed to confirm alignment, and avoid excessive cutting speeds that can cause chatter and wear. A clean workstation with good lighting helps you spot misalignment before it becomes a costly mistake.
Real-world scenarios: choosing between steel, aluminum, and plastic
In steel, you’ll typically see tighter tolerances and higher friction, making lubrication and slow, steady tapping essential. Aluminum finishes well with moderate speeds and generous lubrication to prevent galling. Plastic parts may require shallower threads and careful deburring to avoid cracking. The 1 4 28 tap drill approach remains consistent: select a pilot size appropriate to the material, finish cleanly, and verify thread fit with a gauge.
Quick-start checklist before you begin
- Identify thread size and material. - Confirm you have a sharp drill bit and clean, sharp tapping tools. - Secure the workpiece and mark the starting point. - Prepare lubrication and clearance for chips. - Prepare a gauge for final thread verification. Following these steps minimizes surprises and keeps projects moving.
The role of measurement accuracy and inspection after tapping
After tapping, inspect the threads with a gauge or thread ring to confirm accuracy. A well-cut thread should allow a bolt to thread in smoothly without cross-threading. If you notice binding or misalignment, evaluate drill bit sharpness, hole alignment, and tapping technique. A quick rework, if needed, can save the project from potential failure.
Final note on the 1 4 28 tap drill approach and brand guidance
The core takeaway is consistent: start with the correct pilot hole, use proper lubrication, and maintain steady technique. The Drill Bits Pro team recommends documenting pilot-hole sizes and tapping results for future reference, which builds accuracy over time and reduces rework across similar projects.
Tools & Materials
- 1 4 28 tap drill bit(High-speed steel preferred; keep sharp for clean holes)
- Drill with appropriate chuck or drill press(Stable mounting to prevent deflection)
- Center punch and marking tools(Accurate starting point to prevent wandering)
- 1/4-28 tap(Use a quality tap with a matching tap wrench)
- Tap wrench or T-handle(Helps control torque and straight threads)
- Cutting oil or tapping fluid(Lubrication reduces heat and wear)
- Centering/fixturing clamp(Keeps the workpiece from shifting)
- Deburring tool or file(Important for plastic or soft metals to remove burrs)
- Thread gauge or go/no-go gauge(Verify thread engagement after tapping)
- Safety glasses and gloves(Protect eyes from chips; keep hands clear of rotating parts)
Steps
Estimated time: 45-60 minutes
- 1
Verify thread size and material
Confirm the target thread is 1/4-28 UNC and choose a pilot hole size appropriate for the material. Check tolerances and ensure the workpiece is securely clamped before starting.
Tip: Double-check the workpiece orientation to avoid misaligned tapping. - 2
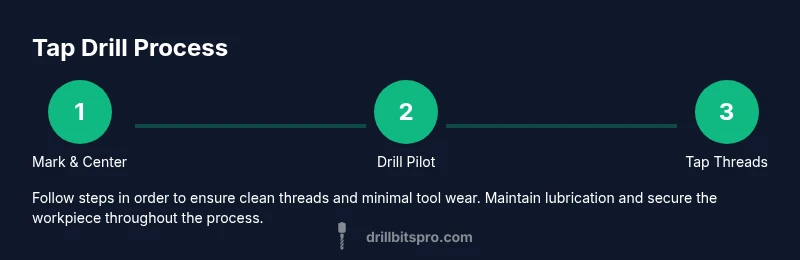
Mark and center the starting point
Use a center punch to mark the spot exactly where the hole will be drilled. This helps keep the drill from wandering, especially on curved or uneven surfaces.
Tip: Lightly tap the punch to avoid denting the workpiece. - 3
Drill the pilot hole
Select the pilot drill size appropriate for your material and drill straight into the marked point with steady pressure. Maintain pecking strokes if drilling deep holes to clear chips.
Tip: Use a slow to moderate speed; avoid high RPM on hard materials. - 4
Deburr and clean the hole
Remove burrs and clean chips from the hole to ensure smooth tapping. Deburring helps prevent thread damage and improves alignment.
Tip: Wipe the hole with a clean cloth before tapping. - 5
Lubricate and align the tap
Apply a light coating of cutting oil to the tap and hole. Align the tap squarely with the hole to avoid cross-threading and ensure straight threads.
Tip: Start with the tap by hand to confirm alignment before using the wrench. - 6
Tapping with steady pressure
Turn the tap slowly, applying even pressure. Back off slightly every few turns to break chips and reduce heat buildup.
Tip: Avoid forcing the tap if resistance increases; back out and re-lubricate. - 7
Finish and inspect
Remove the tap, clean the threads, and test with a suitable bolt or gauge. Look for clean engagement and no cross-threading.
Tip: If threads feel tight, re-check hole size and lubrication.
Got Questions?
What is the correct pilot hole size for a 1 4 28 tap drill?
The pilot hole size depends on both the material and the desired thread engagement. Use a tapping chart or manufacturer data to select the right hole diameter for the 1 4 28 tap drill. Always verify with a thread gauge after tapping.
The right pilot hole size depends on material and engagement. Check a tapping chart and verify with a gauge after tapping.
Can I tap aluminum with this method?
Yes, tapping aluminum is common, but you should use appropriate lubrication and moderate speeds to prevent galling and thread deformation. Start slowly and monitor for smooth thread formation.
Yes, aluminum can be tapped with the right lubrication and moderate speed. Start slow and watch for smooth threads.
What lubricant is best for tapping?
Use a cutting oil or tapping fluid suitable for metal. The goal is to reduce friction and heat, promote chip removal, and extend tool life. Avoid dry tapping.
A good cutting oil or tapping fluid reduces heat and helps remove chips for better threads.
What happens if the tap breaks in the hole?
A broken tap can be difficult to remove and may ruin the hole. It's best to back out slowly if resistance increases, repair the hole if necessary, and use a extractor if required. Prevention through proper lubrication helps.
If a tap breaks, don't force it. Use proper extraction tools or repair steps and recheck the hole.
Is hand tapping acceptable for small projects?
Yes, for small projects a tap wrench or T-handle can be sufficient, provided you maintain steady pressure and alignment. For larger or harder jobs, a drill press offers better control.
Hand tapping is fine for small jobs if you keep steady pressure and proper alignment.
Watch Video
Top Takeaways
- Identify material and thread size before drilling.
- Use a correctly sized pilot hole to prevent binding.
- Lubricate and steady the tapping motion to minimize heat.
- Inspect threads with a gauge for proper engagement.
- document pilot-hole sizes and results for future projects.