How to Drill for an Anchor: A Complete DIY Guide
Learn how to drill for an anchor safely and accurately. This comprehensive guide covers drill bit selection, hole sizing, drilling technique, and anchor installation for concrete, brick, and block surfaces. Includes tips, tools, and safety considerations from Drill Bits Pro.

By the end, you’ll be able to drill accurately for a masonry anchor using a hammer drill, a masonry bit sized to the anchor, and a clean, perpendicular hole. Start with marking the location, selecting the correct bit, drilling the hole straight, clearing dust, and installing the anchor with the proper setting tool. This method applies to concrete, brick, and block surfaces.
Why proper drilling for anchors matters
Anchors transfer structural loads from a fixture into solid material, so precision matters. If you drill too small a hole, the anchor may not seat properly; if the hole is too large, the anchor may spin, slip, or fail under load. The Drill Bits Pro team emphasizes that perpendicular drilling and clean holes maximize grip and pull-out resistance. In masonry, concrete and brick are porous, requiring a dust-free bore to ensure the anchor seats correctly and expands as designed. Understanding load types—shear versus tension—and choosing the right anchor for the substrate are essential first steps. A correctly drilled hole also reduces the risk of micromotion that could loosen fasteners over time, improving long-term safety. When in doubt, test a small fixture on a scrap piece of the same material to verify the holding strength before committing to the final installation.
Anchor types and compatibility with substrates
There are several common anchor families for masonry: sleeve anchors, wedge anchors, drop-in anchors, and urethane or mechanical anchors. Sleeve and wedge anchors are typically used in concrete for heavy loads; drop-in anchors suit hollow cores or lighter fixtures, while expansion shields work well in brick or block. The key is to match the anchor’s design to the substrate and load requirement. For example, sleeve anchors rely on friction and expansion, so a precise hole diameter is crucial; using a bit that’s too small prevents expansion, while too large a hole reduces gripping surface. Always verify that the anchor type you select is rated for the substrate and the anticipated load.
Drill bits and equipment for masonry anchors
Masonry drilling requires carbide-tipped or diamond-coated bits with a dedicated masonry drill. Use a bit that matches the anchor’s recommended hole diameter (not just a “close fit”). For most concrete anchors, common sizes range from 8 mm to 12 mm (5/16
). When you drill, use a hammer drill setting to create a clean bore and prevent bit wandering. A dust extraction method or vacuum helps keep the hole clean; clogged holes compromise anchor seating. Ensure your drill bit is sharp and free of glazing, and avoid excessive pressure that can overheat and dull the bit.
Surface considerations: concrete, brick, and block
Concrete is the most common anchor substrate, but brick and concrete block require different considerations. In dense concrete, you’ll want to maintain consistent RPM to avoid “bit skating” or wandering. In hollow brick or block, consider sleeves with longer anchors to guarantee grip across the cavity. If the surface is rebar-laden, use a drill with good alignment and a center punch mark to avoid hitting metal. Always test for voids behind the surface with a magnet or wall detector before drilling and adjust your approach accordingly.
Marking, measuring, and alignment techniques
Accurate hole placement matters more than most realize. Use a level and a center punch to create a precise starting point. A slow, steady drill pace reduces deflection. Mark the drilling depth on the bit with tape to prevent over- or under-drilling. If you’re mounting multiple anchors, align them with a straight edge or laser line to ensure uniform spacing. Start with a pilot hole if the anchor size is large; this reduces the chance of the bit slipping and helps the main hole stay true.
Dust control and hole preparation
Dust is the enemy of secure anchors. Use a vacuum attachment or a dust collection system to capture debris as you drill. Clean the bore with a stiff brush or compressed air (where allowed) to remove loose particles. A clean, dry hole ensures the anchor can set properly and reach its rated load. Avoid blowing dust back into the hole with your mouth or with air from your mouth; use proper ventilation and PPE.
Step-by-step preparation before drilling
Before you touch the drill, confirm the fixture location, anchor type, and hole diameter. Check that you have the correct drill bit and anchor length for the substrate. Put on safety glasses, gloves, and a dust mask if needed. Mark the exact center points, double-check spacing, and verify no hidden utilities. A dry-run with a test hole on a scrap piece of the same material helps reduce on-site surprises. The cleanliness of the work area will influence the anchor’s performance, so take a moment to prepare.
Common mistakes and how to avoid them
Avoid choosing the wrong anchor type for the substrate; always consult the anchor’s specification sheet. Don’t skip cleaning the hole—dust can prevent full seating. Do not over-torque the anchor, which can pull it out of the substrate. Ensure perpendicular drilling; angled holes compromise shear strength. If you encounter rebar, switch to a carbide-tipped bit designed for metal and remove the rebar fragment from the hole before continuing.
Safety, maintenance, and best practices
Always wear PPE: safety glasses, gloves, and a dust mask or respirator for dusty work. Keep cords organized to avoid trips, unplug tools when not in use, and secure the workpiece. After installation, inspect anchors periodically for signs of loosening or corrosion, especially in outdoor or humid environments. Use anchors and fasteners rated for the expected load and environmental conditions.
Tools & Materials
- Hammer drill or rotary hammer with corded or cordless power(Choose a model with variable speed and a reliable hammer setting)
- Masonry drill bits (carbide-tipped)(Size to match anchor diameter; keep sharp for clean holes)
- Anchors compatible with substrate (sleeve, wedge, or drop-in)(Select based on load and material)
- Correct anchor length(Ensure it reaches the required embedment in the substrate)
- Measuring tools (tape measure, ruler)(For spacing and depth marks)
- Center punch and level(Mark location and ensure straight drill path)
- Safety gear (safety glasses, gloves, dust mask)(Protect eyes, hands, and lungs)
- Dust collection or vacuum(Keep holes clean for proper seating)
- Pencil or marker(Mark drilling points clearly)
- Compressed air or brush(For thorough cleaning in deeper holes)
Steps
Estimated time: 30-45 minutes
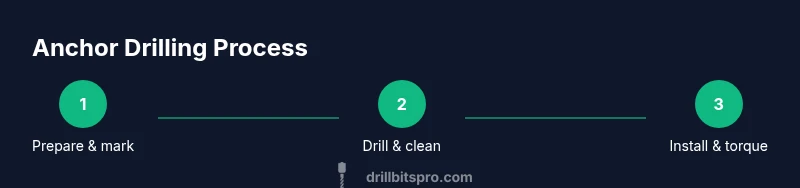
- 1
Prepare and mark the location
Identify the exact mounting location and mark it with a pencil. Use a level to ensure alignment and a center punch to create a small indentation for starting the hole.
Tip: Double-check alignment with a straightedge before drilling. - 2
Select the correct drill bit and anchor
Choose a masonry bit sized to match the anchor’s hole diameter. Confirm the anchor length and load rating suit the substrate and fixture.
Tip: When in doubt, verify with the anchor manufacturer’s guidelines. - 3
Set up and start drilling
Place the bit on the mark and begin at a slow speed using the hammer function. Apply steady pressure without forcing the bit. Keep the drill perpendicular to the surface.
Tip: Let the bit do the work; excessive pressure causes glazing and heat buildup. - 4
Drill to the correct depth
Drill to the marked depth using depth stop or a piece of tape on the bit. Stop immediately if you encounter hard material or metal reinforcement.
Tip: Check depth frequently to avoid over- or under-drilling. - 5
Clean the hole thoroughly
Remove dust and debris with a vacuum, brush, and if allowed, dry air. A clean bore ensures the anchor seats properly.
Tip: A dust-free hole improves pull-out strength significantly. - 6
Install the anchor
Insert the anchor and follow the manufacturer’s setting procedure (tighten to recommended torque or use the supplied setting tool).
Tip: Do not oversize bolts beyond the anchor rating; over-torque reduces grip.
Got Questions?
What is the best drill bit for concrete anchors?
Carbide-tipped masonry bits are standard for concrete anchors. Size the bit to the anchor’s hole diameter to ensure a tight fit and proper seating.
Use carbide masonry bits sized to your anchor’s hole diameter for the best grip.
Do I really need a hammer drill for masonry anchors?
Yes. A hammer drill or rotary hammer helps the bit cut through masonry efficiently and reduces bit wandering compared with a standard drill.
A hammer drill is essential for masonry drilling to ensure clean, accurate holes.
How do I know the correct hole size for a specific anchor?
Always refer to the anchor’s specification sheet. Use the recommended bore diameter and depth to ensure proper expansion and load capacity.
Check the anchor's spec sheet for the exact drill diameter and depth.
Can I use plastic wall anchors in concrete?
Plastic wall anchors are not suitable for concrete substrates. Use masonry anchors designed for concrete or brick.
Plastic wall anchors aren’t for concrete; use proper masonry anchors.
What safety gear should I wear when drilling?
Wear safety glasses, gloves, and a dust mask. Keep the work area clear of loose debris and secure cables.
Always wear eye protection, gloves, and a dust mask when drilling.
What should I do if the anchor won’t set?
Double-check hole size, depth, and cleanliness. Ensure you’re using the correct anchor type for the substrate and verify torque specifications.
If it won’t set, re-check hole size and cleanliness and try again with the correct torque.
Is there a difference between hollow and solid masonry substrates?
Yes. Hollow substrates tolerate different anchors (often longer or sleeve types), while solid substrates rely more on expansion and friction. Choose accordingly.
Hollow masonry needs different anchors than solid concrete; choose based on substrate.
How can I test anchor holding after installation?
Apply a light load in the intended direction to confirm seating, then perform the full test load per the spec sheet. Check for movement or loosening.
After install, test with a light load and then the full rated load if possible.
Watch Video
Top Takeaways
- Choose anchors matched to substrate and Load
- Keep holes clean for maximum grip
- Drill perpendicularly to avoid deflection
- Verify depth with tape before drilling
- Follow manufacturer torque for anchor setting