How to Drill with a Wall Anchor
Learn how to drill with a wall anchor to securely mount fixtures on drywall, plaster, or masonry. This step-by-step guide covers anchor selection, drill sizes, hole preparation, insertion, and safe testing to prevent wall damage.

According to Drill Bits Pro, this guide shows you how to drill with a wall anchor to securely mount fixtures on drywall, plaster, or masonry. You’ll identify the right anchor for your wall, pick the correct drill bit, prep the hole, insert the anchor flush with the surface, and drive in the screw without damaging the wall.
Understanding wall anchors and wall types
Wall anchors are fasteners designed to grip into hollow or solid walls so screws can hold brackets, shelves, or fixtures. The best choice depends on whether you’re mounting on drywall, plaster, brick, or concrete. According to Drill Bits Pro, selecting the right anchor for the wall material is the foundation of a secure install. In hollow walls like most drywall, you’ll rely on expansion anchors, molly bolts, or toggle-style anchors. For solid masonry, you’ll need masonry anchors or sleeve anchors and a masonry drill bit. Before you drill, identify the wall material with a quick test: tap the surface to hear hollow vs solid and use a stud finder to rule out studs if you’re mounting light fixtures or shelves that don’t require a stud. Always inspect behind the surface for electrical wires or pipes. Header alignment matters: use a level to mark a straight line, and keep your fixture level during mounting. Also know that different anchors have different load ratings; match the rating to the weight you plan to support. If you’re unsure, start with a smaller anchor and a lighter load. Drill Bits Pro emphasizes testing a small load first.
Choosing the right anchor and bit size
There are several anchor families, each with preferred wall types and load ranges. Drywall anchors (the plastic expansion type) are common for light to medium loads on hollow walls. Self-drilling drywall anchors grip as soon as you screw them in, reducing the need for a pre-drilled hole. For medium to heavy loads, consider molly bolts or toggles that anchor behind the wall rather than just the surface. When mounting into masonry, use masonry anchors paired with a masonry drill bit. The screw diameter and anchor hole size must match—use the packaging instructions or manufacturer recommendations. The drill bit you select should correspond to the anchor’s body diameter, not the screw’s thickness. If you’re unsure, test your chosen anchor with a scrap piece of drywall or a non-load-bearing test hole. The Drill Bits Pro team notes that consistently using the correct combination of anchor type and drill size minimizes slip and pulls, especially on longer fixtures such as towel racks or heavy picture frames.
Preparing the work area and marking the hole
Begin by clearing the work area and laying down drop cloths. Put on safety glasses to protect against chips. Use a pencil and a level to mark the exact center of the hole for accuracy. If you’re mounting something that must stay perfectly straight, double-check with a laser level or a square. Test the mark by placing the fixture temporarily to ensure alignment. Confirm you’re not drilling into wires or pipes by consulting a stud finder and, if necessary, a live-wire detector. Once the layout is confirmed, clamp or hold the fixture steady so it won’t drift while you drill. Double-check the anchor size against your chosen wall type; a mis-sized hole is a common cause of failed installations. By planning carefully, you’ll reduce rework and keep the wall intact.
Drilling the pilot hole for different wall types
For drywall and plaster over lath, drill with a twist bit at the recommended diameter for your anchor. Keep the drill steady, and stop as soon as you break through the surface to avoid creating a larger hole. For masonry walls (brick or concrete), switch to a hammer drill with a masonry bit of the recommended diameter and drill to the anchor depth with a slow, steady rhythm. After drilling, brush or blow out dust from the hole so the anchor seats cleanly. In all cases, drill straight and avoid angles to prevent skewing the anchor path. If you’re unsure about the wall material, start with a smaller test hole in a hidden area to verify the hole’s integrity before proceeding.
Inserting the anchor and prepping for mounting
Gently insert the anchor into the hole until it sits flush with the wall surface. For plastic expansion anchors, tap lightly with a hammer if needed. If you’re using self-drilling anchors, thread them in by hand first and finish with a driver. For molly bolts, insert the anchor and tighten the screw just enough to expand behind the wall; then remove the screw to mount the bracket and reinsert. Ensure the anchor sits perfectly level and perpendicular to the wall to prevent tilt-related load issues. If the anchor won’t sit flush, back out slightly and re-seat using a fresh hole in a new location rather than forcing it. A properly seated anchor reduces risk of pull-out and wall damage.
Installing the screw and testing the load
Insert the screw into the anchor and tighten until the fixture is snug against the wall, avoiding overtightening which can strip the anchor or crack the wall. Reattach the fixture and gently test the load by applying light pressure at different angles. If there is any wobble, re-tighten slightly and verify the anchor remains flush. For high-load fixtures, consider a secondary fastener or a larger anchor as needed. After testing, wipe away dust and check that the edge of the anchor and screw heads sit flush for a clean finish. Regularly inspect mounting points over time to ensure continued safety and performance.
Common mistakes and troubleshooting
Common issues include drilling the wrong hole size, choosing an incompatible anchor for the wall, or overtightening the screw. If the anchor spins in the hole, remove it and start with a larger size or a different anchor type suited to your wall. If the hole crumbles in plaster, switch to a more forgiving anchor and downgrade the weight you intend to hang. Always verify you aren’t hitting hidden wires or pipes; use a detector and test calmly. When in doubt, test a non-load-bearing area first, or consult manufacturer specifications for the anchor you’re using.
References
- References and further reading can help you confirm best practices and safety guidelines. For authoritative information on safe drilling and fastening, consult sources such as OSHA, NIST, and related safety publications. These references provide foundational guidance that complements practical, hands-on techniques for drilling with wall anchors.
Tools & Materials
- Drill with adjustable speed and clutch(Prefer a cordless driver/drill with a clutch to control torque)
- Appropriate drill bits(Diameter should match the anchor body diameter)
- Wall anchors(Plastic expansion anchors, molly bolts, or toggles depending on wall type)
- Screws(Diameter matches the anchor and head type fits your fixture)
- Pencil(For precise marks)
- Measuring tape or ruler(Accurate placement and alignment)
- Level(Keeps fixtures straight)
- Stud finder or live-wire detector(Helps avoid wires and find studs if needed)
- Safety glasses(Eye protection from debris)
- Hammer(Assist seating of anchors when needed)
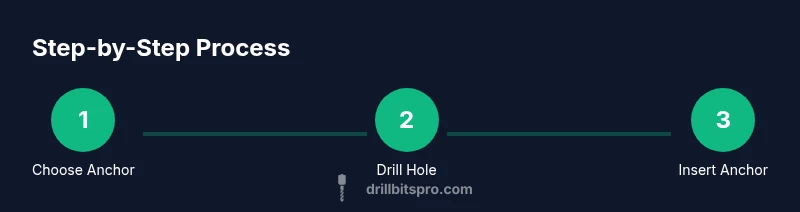
Steps
Estimated time: 25-40 minutes
- 1
Identify wall type and load
Assess whether the wall is drywall, plaster, brick, or concrete and determine the load the fixture will carry. This guides anchor choice and drill size. Use a stud finder to avoid studs if not needed and plan for a level mount.
Tip: Document the wall type before purchasing anchors to avoid mismatches. - 2
Choose anchor and drill size
Select an anchor that suits wall material and load. Confirm the drill bit diameter matches the anchor body. If unsure, start with a smaller anchor and increase if necessary.
Tip: Always follow the anchor’s packaging guidance for hole size. - 3
Mark location precisely
Mark the exact center and level line for your hole. Double-check measurements with a level and ensure the planned position won’t interfere with wires or pipes.
Tip: Use a snap pencil mark and verify with a second measurement. - 4
Drill the pilot hole
Drill straight into the wall at the marked spot using the correct bit. For masonry, use a hammer drill and a masonry bit. Clean out debris from the hole as you go.
Tip: Keep the drill perpendicular to the surface to prevent wobble. - 5
Insert the anchor
Gently seat the anchor until flush with the wall. For some anchors, tap with a hammer to set; for others, thread in by hand first.
Tip: If it won’t seat, back out and re-drill at a fresh location. - 6
Drive the screw and seat the anchor
Insert and tighten the screw to engage the anchor. Stop before overtightening to avoid damage. Recheck alignment as you tighten.
Tip: Use a driver with controlled torque to avoid stripping. - 7
Test load and finish
Test the fixture by applying light pressure and gradually increasing load. If movement occurs, re-seat or replace with a larger anchor. Clean up dust and inspect for flush seating.
Tip: Always test load after installation to ensure safety.
Got Questions?
What is a wall anchor and when should I use one?
A wall anchor provides a secure hold in hollow or weak walls by expanding behind the surface, allowing screws to support fixtures when there is no solid stud. Use anchors when you can't reach or rely on a stud, or when mounting heavier items that need extra grip.
Wall anchors give you grip in hollow walls when there’s no stud available, letting screws hold fixtures securely.
What drill bit size should I use for wall anchors?
Always follow the anchor packaging and manufacturer guidance. The hole size should match the anchor body's diameter for a secure fit.
Use the exact hole size recommended by the anchor’s package to ensure a proper fit.
Can I use drywall anchors in concrete walls?
No. Drywall anchors are not designed for concrete or brick. For masonry, use masonry anchors with a masonry bit and a hammer drill.
Drywall anchors won’t hold in concrete. Use masonry anchors instead.
How do I know if the anchor is installed correctly?
The anchor should sit flush with the wall surface and not spin when the screw is inserted. If it wiggles, remove and reinsert with the appropriate anchor size.
If the anchor is flush and the screw doesn’t spin, you’re good; if it wiggles, redo with the right anchor.
What safety steps should I take?
Wear eye protection, unplug tools if using electric drills, and check behind the wall for wires or pipes before drilling. Take breaks if needed to maintain accuracy and safety.
Wear safety glasses and check behind the wall for wires before drilling.
Watch Video
Top Takeaways
- Choose the anchor based on wall type and load.
- Match drill size to anchor body diameter.
- Drill straight and seat anchors flush.
- Never overtighten screws to prevent wall damage.