Nailing Without a Drill: How to Drive Nails by Hand Safely
Learn practical, tool-free nail-driving techniques for wood projects. This step-by-step guide covers hand hammering, starter guides, and flush finishing with safety tips for DIYers and professionals.

Goal: drive a nail cleanly into wood without a drill. This guide shows reliable hand-driven methods, how to create starter guides with an awl or nail starter, and how to finish flush with a punch. Required gear includes a hammer, appropriate nails, clamps for stability, safety glasses, and an awl or punch for precision. Perfect for DIYers and professionals seeking practical non-drill nails techniques.
The non-drill approach: overview and benefits
Driving a nail without a drill is a fundamental carpentry skill that remains essential for fast repairs, trim work, and on-site jobs where power tools aren’t practical. The method relies on precise alignment, appropriate nail selection, and steady hammer strikes to create strong joints with minimal wood splitting. Benefits include silent operation, lower fatigue for small projects, reduced risk of accidental tool damage, and fewer holes to patch if you’re working with delicate materials. This approach shines when you’re assembling picture frames, repairing loose trim, or mounting light hardware where a powered drill is unnecessary overhead. Before you begin, recognize limitations: hand-driving is slower for long or heavy-duty fastenings, and denser woods or thick stock may require pilot holes or brief pin-point preps to avoid splitting. With careful planning and the right tools, you can achieve professional results with nothing more than a hammer and nails.
Nail types for non-drill applications
For projects that don’t require a drill, the nail choice can make or break a joint. Finish nails, brads, and small common nails are designed to minimize tear-out and leave a neat, invisible finish when properly driven. Finishing nails (about 1-2 inches for typical trim) are easy to countersink with a punch and can be set below the surface for wood filler. Brads are thinner and reduce splitting in soft woods, but they don’t hold as much load. When mounting hardware or frames, choose nails with a larger head for grip, or go with a specialty nail for hardwoods. Always match nail length to wood thickness: the nail should penetrate at least 2/3 of the board’s thickness but not protrude beyond the back edge. If you’re unsure, test on scrap to prevent waste.
Essential hand tools for driving nails without a drill
While you won’t rely on a powered drill, you’ll still need a few reliable hand tools. A hammer with a comfortable head weight (typically 16-20 oz) gives you enough force without causing finger fatigue. A good set of nails in varying lengths lets you tailor the hold to the wood. An awl or nail starter helps create a tiny pilot guide, reducing wandering on dense grain. A nail punch or the handle of a nail set lets you countersink the head flush with the surface. Clamps stabilize your work, while safety glasses protect your eyes from flying chips. If you measure long distances or verify square corners, a tape measure and square keep joints accurate. Finally, keep a piece of scrap wood handy to test your hammer blows and nail depth before committing to the project.
Step-by-step hand-drive method: plain hammer and nails
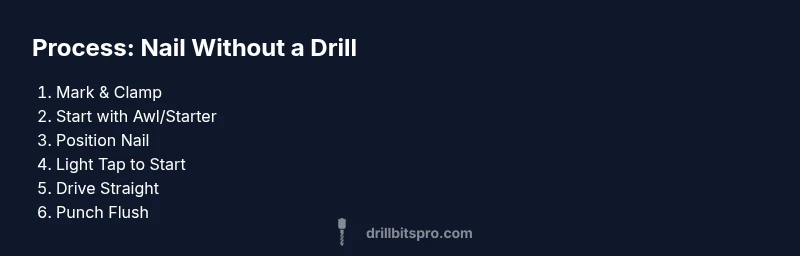
- Prepare the workpiece by securing it with clamps and marking the exact nail location on the surface. 2) Position the nail perpendicular to the surface, aligning with the mark. 3) Tap the nail lightly to start it, maintaining a straight line as you nudge it into the wood. 4) Increase strike force gradually, driving the nail until the head sits flush or just below the surface. 5) If the wood shows a slight wobble, pause, re-align, and re-start the drive rather than forcing it. 6) Finish with a light tap to seat the head and prevent mushrooming. 7) If you need flush countersinking, use a punch to set the head below the surface. Tip: take short, controlled taps rather than hard blows to minimize bending and surface damage.
Using a starter guide: awl, nail starter, and punch
An awl or dedicated nail starter creates a small pilot hole that directs the nail and reduces wood splitting. Mark the spot, pierce a shallow indentation, then insert the nail at a slight angle before straightening it for full driving. If the nail begins to wander, pause, re-check alignment, and re-seat the nail. Once fully driven, switch to a nail punch to countersink the head to the desired depth. For thicker boards, you may want to pre-stain the area to reveal any potential swelling after driving. A steady stance and a relaxed grip help maintain accuracy during this process.
Techniques for hard woods and preventing bending
Hardwoods demand extra care. Use a shorter nail and start with a small pilot hole or deep scratch to guide the nail. Keep the wood clamped and resist the urge to swing wildly; place your body weight behind the hammer with controlled, straight blows. If the nail begins to bend, back it out slowly instead of forcing it, which can cause splits and warping. For very dense wood, consider alternating nail placement to reduce stress and splitting. When in doubt, test a practice nail on scrap to calibrate hammer head pressure and speed.
Finishing: flush countersinking and cover small gaps
After driving, you may want the nail head flush or slightly recessed. A nail punch helps you countersink the head without leaving marks. Place the punch over the nail head and tap gently until it sits below the surface. If gaps remain around joints, apply a thin bead of wood filler and sand smooth once dry. The filler helps create a seamless appearance and can be tinted to match the wood. Remember to wipe away excess filler before it dries to prevent rough patches. Finally, inspect the joint for alignment and smoothness; the project’s appearance depends on this step.
Safety practices and workspace setup
Always work in a clean, dry area with good lighting. Secure the workpiece with clamps to prevent movement. Wear safety glasses to guard against flying chips, and keep fingers away from the hammer's striking zone. Use a stable stance; position your body so your strikes are controlled and predictable. If you’re new, practice on scrap wood to tune your depth and alignment. Keep nails organized by length and type to reduce misfires. When finishing, store tools safely to avoid trips or accidental injuries.
Common mistakes and quick fixes
Common mistakes include striking too hard, bending nails, missing the mark, and insufficient clamping. A quick fix is to back out the nail, realign, and drive again with shorter, measured taps. If the wood splits, drill or pre-drill in the future, or switch to a smaller nail. If you’re hitting the wrong depth, adjust your strike length. Always leave a minor gap for expansion in seasonal wood. For hidden joints, consider re-driving nails along grains for better hold.
Practical project example: frames or trim
Consider building a small picture frame. Cut a 1x4 board to length, create miter joints, and use finishing nails to assemble. Clamp securely, mark the nail positions, and drive nails along the grain at a slight angle to resist pullout. Countersink with a punch and fill with wood filler. Sand the joints smooth, apply finish, and inspect alignment. This project illustrates the nuanced control required when driving nails by hand and shows how to achieve professional results without a drill.
Authoritative sources
- OSHA: Safety and best practices for manual hammering; https://www.osha.gov
- University of Minnesota Extension: Woodworking techniques and nail selection; https://extension.umn.edu/woodworking
- Cornell University Extension: Woodworking basics and hand-tool use; https://extension.cornell.edu
Tools & Materials
- Hammer (16-20 oz)(Choose a comfortable weight for control and accuracy)
- Nails (finish nails 1–2 in)(Select nail length based on wood thickness)
- Awl or nail starter(Creates a starter guide hole to prevent wandering)
- Nail punch(Flush countersink without marring wood surface)
- Clamps(Keeps workpiece steady during driving)
- Safety glasses(Protect eyes from chips)
- Measuring tape or square(Helpful for accurate placement)
Steps
Estimated time: 15-25 minutes
- 1
Prepare the workpiece
Secure the board with clamps and mark the nail location. Ensure the surface is clean and dry to prevent slippage during driving.
Tip: Use scrap wood beneath to avoid marring the actual workpiece. - 2
Mark the exact location
Use a pencil to indicate the nail spot and align with the grain to maximize hold.
Tip: Double-check alignment with a square before starting. - 3
Position the nail
Hold the nail perpendicular to the surface and place it on the mark.
Tip: Keep the nail just touching the surface until you begin tapping. - 4
Start the nail
Tap lightly to embed the tip and start a straight entry path.
Tip: Short, controlled taps reduce wandering and bending. - 5
Drive to depth
Increase strike force gradually, keeping a straight line to seat the head.
Tip: If it goes off line, stop, realign, and start again in small taps. - 6
Finish and countersink
Use a nail punch to set the head flush or slightly below the surface.
Tip: Wipe away dust before applying filler for a smooth finish.
Got Questions?
What nails are best to use when avoiding a drill?
For non-drill work, finish nails or brads 1-2 inches long are reliable for soft woods and trim. They’re easier to countersink and finish, providing a neat appearance.
Finish nails or brads about one to two inches work well for non-drill work and look neat when countersunk.
Can I start a hole without a drill?
Yes. An awl or nail starter creates a small pilot hole to guide the nail and reduce wood splitting, especially in hardwoods.
Yes. Use an awl to start a pilot hole to guide the nail and prevent splitting.
How can I prevent bending nails?
Keep the nail aligned with the grain, clamp the workpiece, and apply slow, straight taps. If a nail begins to bend, back it out and start again with a fresh hole.
Stay aligned with the grain and tap slowly; if it bends, back it out and try again.
Is pre-drilling necessary for hardwoods?
Pre-drilling by hand is optional for some hardwoods. Use a small awl to guide the nail or a very light pilot hole to avoid splits if the wood is dense.
Pre-drilling can help with hardwoods; use an awl or a light pilot hole to prevent splitting.
What safety measures should I follow?
Wear eye protection, clamp the work, and keep hands clear of the strike zone. Maintain a stable stance to avoid slips.
Wear safety glasses and clamp your work; stay aware of your hammer strikes.
What if space is too tight to hammer correctly?
Use needle-nose pliers to position nails or drive with a small punch if needed. A longer reach tool can help, but avoid forcing.
In tight spaces, position nails with pliers or use a smaller pilot hole before driving.
Watch Video
Top Takeaways
- Drive nails by hand with control for clean joints
- Use starter guides to prevent wandering
- Countersink with a punch for flush finish
- Clamp workpieces and wear safety gear